Alchemy 是什么项目?
2019 年 12 月,Alchemy 完成1500 万美元 A 轮融资,资方为 Pantera Capital,斯坦福大学,Coinbase,三星等。
2021 年 4 月,Alchemy 以 5.05 亿美元估值完成8000 万美元 B 轮融资,Coatue 和 Addition 领投,DFJ Growth、K5 Global、Chainsmokers(烟鬼组合)、演员 Jared Leto 和 Glazer 家族参投。
2021 年 10 月,Alchemy 以 35 亿美元估值完成2.5 亿美元 C 轮融资,由 a16z 领投的。
2022 年 2 月,Alchemy 以 102 亿美元估值完成2 亿美元融资,Lightspeed 与 Silver Lake 领投。
Alchemy 是一个背景强大、经费充足、踏实做事、没有发币的团队,这样的项目不刷,难道去刷土狗吗?
并且,Alchemy 计划将新资金用于推广 Web3 采用,这方面的一些举措包括推出 Web3 University,就是现在的 Road to Web3 活动,活动为期 10 周,每周一个 NFT。看了下 nft 数量极少,估计由于任务难度大,很多小伙伴直接放弃,这样的项目若是空投,绝对是大毛。
手把手第二周教程开始:如何构建“给我买杯咖啡”的 DeFi dapp
官方原版教程链接,其中有长达 1 小时 30 分钟的视频教程还有大篇幅的文字教程,并且有错误。我按照我的做法给大家一个易于操作的图文教程。
step1 安装环境
1.2022 最新 Nodejs 下载安装配置步骤(保姆级教程)
先按照上述教程安装 Nodejs,共分为 5 步,前 3 步做完就正常了,我没有做第 4 和第 5 步,不放心可以做一下。最新版本号如下:

再按照这个教程安装 VScode。
step2 对 BuyMeACoffee.sol 智能合约进行编码
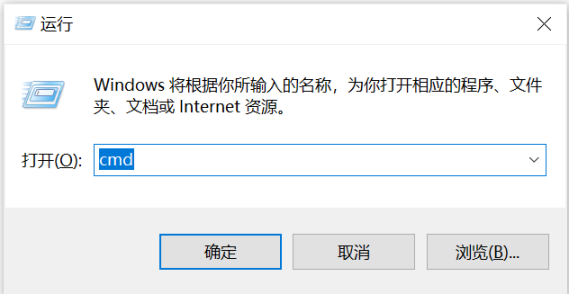
1.按 win+R 调出命令框,输入 cmd,进入控制台。
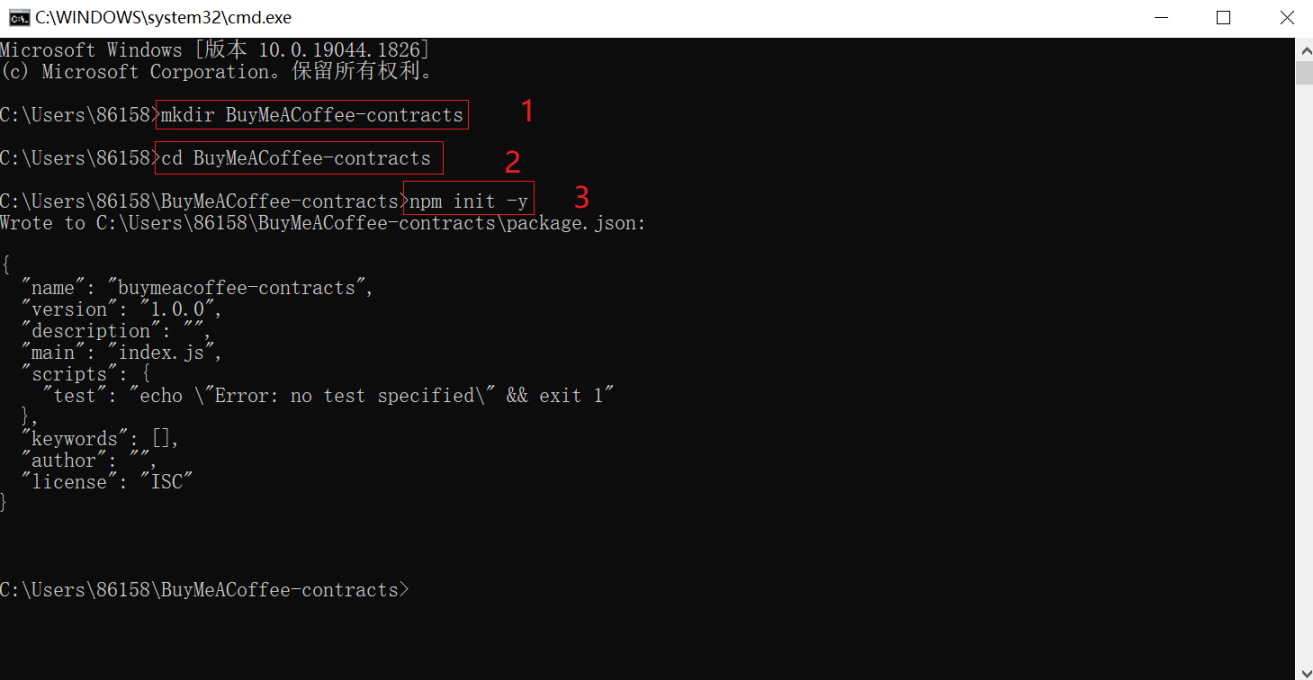
2.输入 mkdir BuyMeACoffee-contracts 按回车创建文件夹,再输入 cd BuyMeACoffee-contracts 按回车进入该文件夹。

3.输入 npm init -y 开始新项目。
4.输入 npx hardhat 创建示例项目。
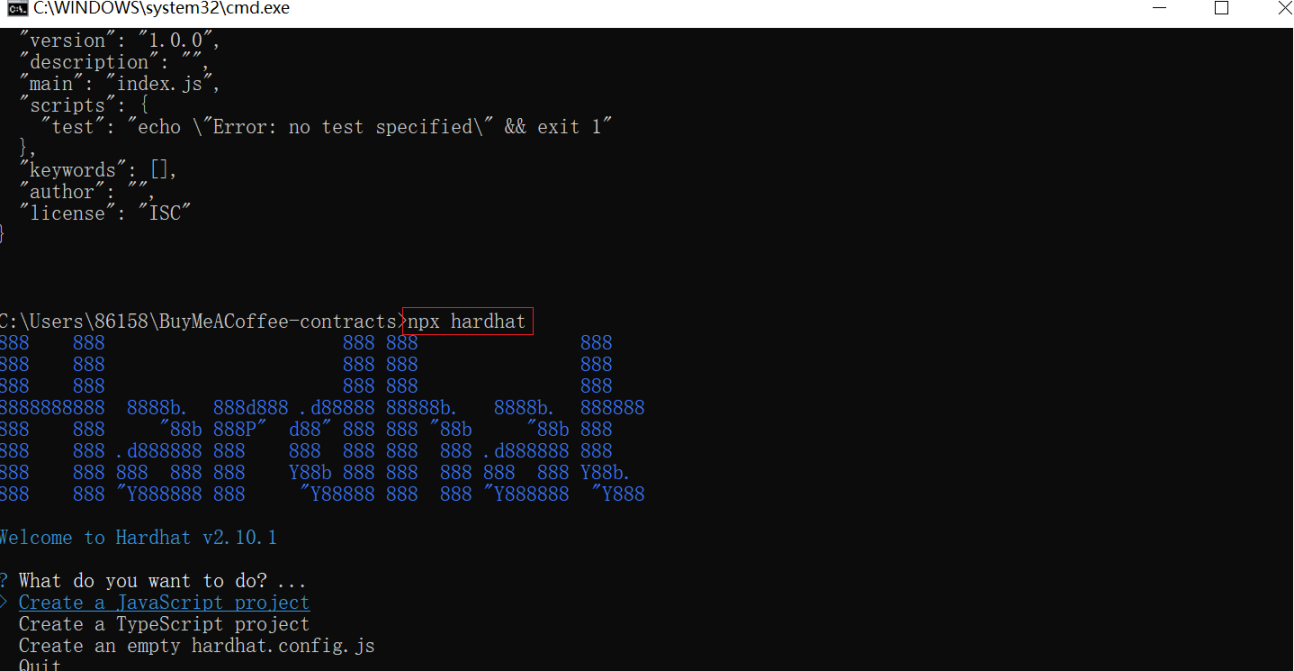
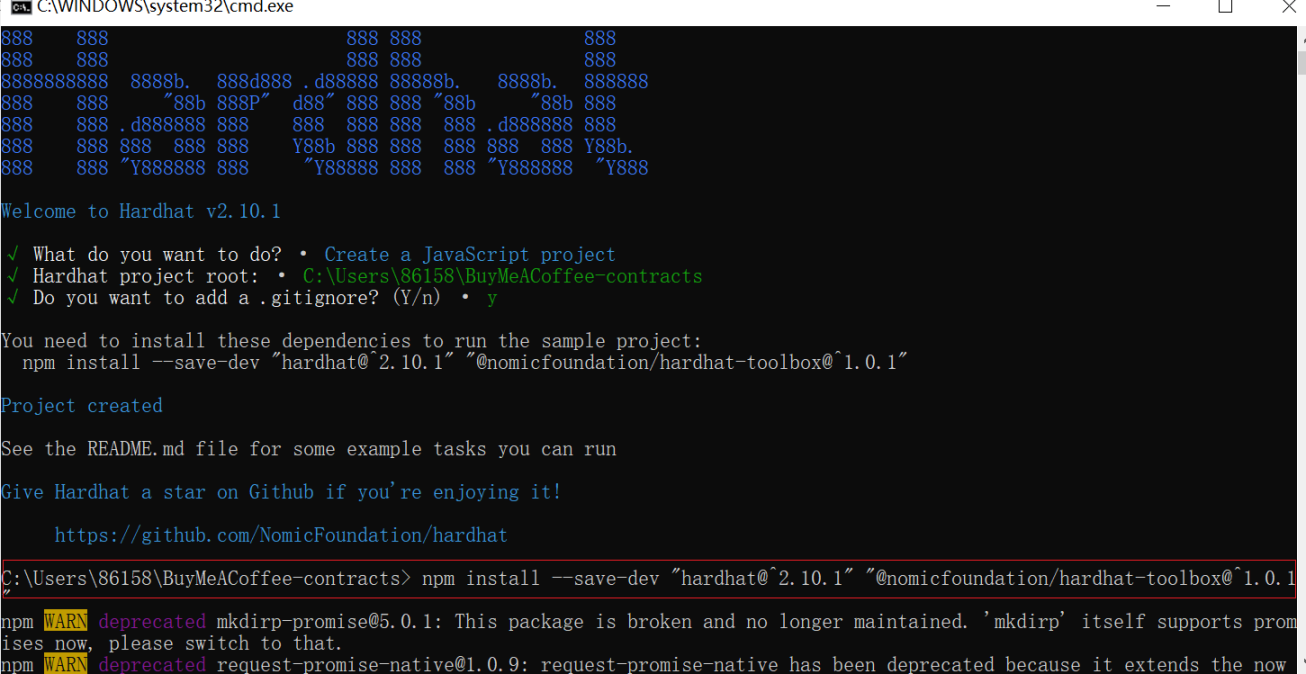
5.之后连按三下回车,出现下图。

6.按照提示输入下面代码,坐等安装完毕。出现警告不管。
npm install –save-dev “hardhat@^2.10.1” “@nomicfoundation/hardhat-toolbox@^1.0.1”
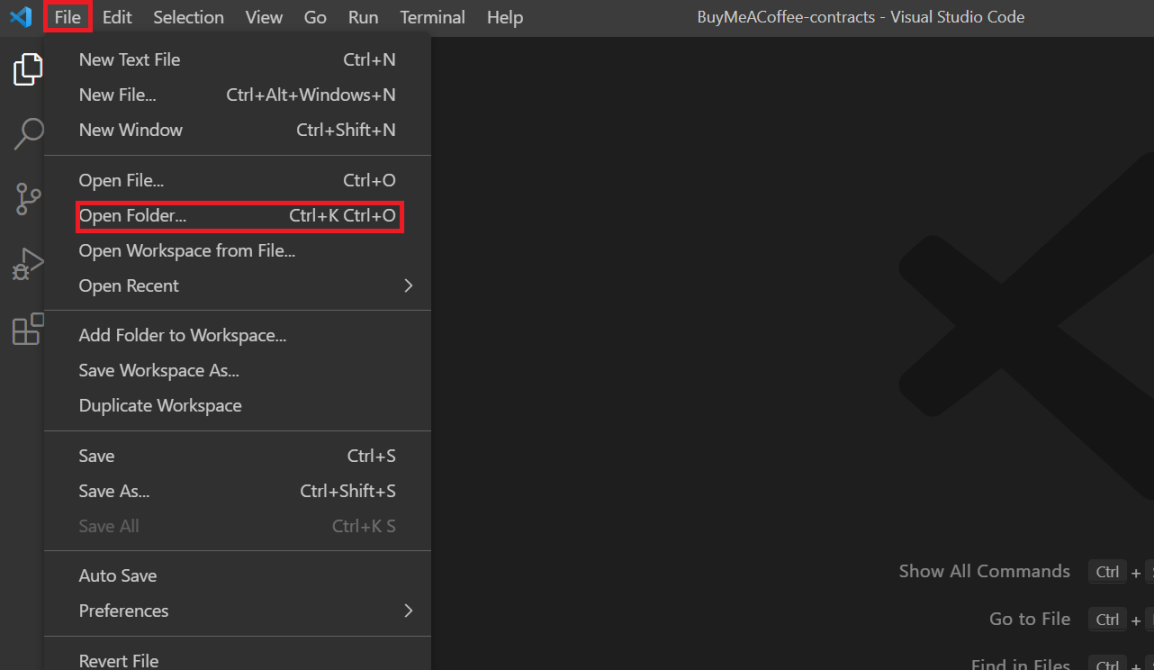
7.打开 vscode,点击 file,点击 open folder。
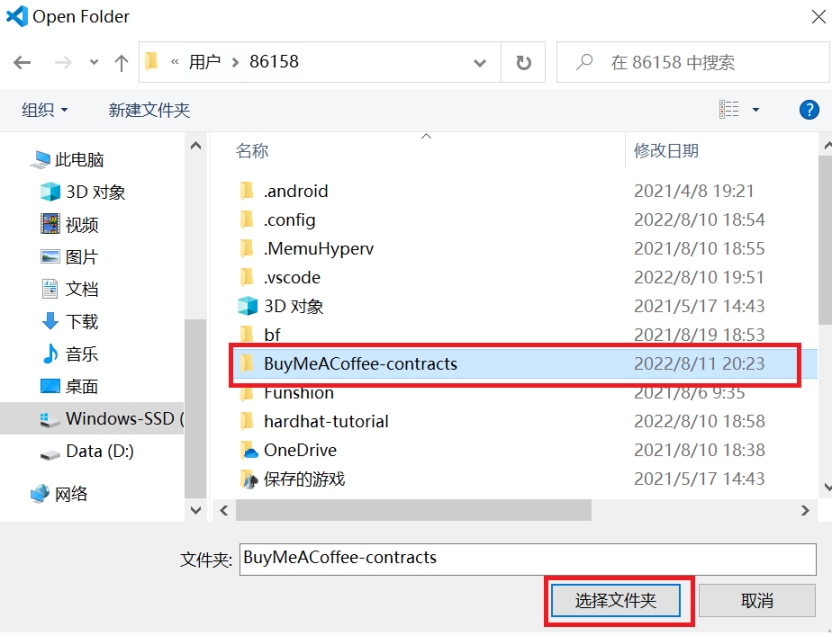
8.找到刚才创建的 BuyMeACoffee-contracts 文件夹,点击选择文件夹。
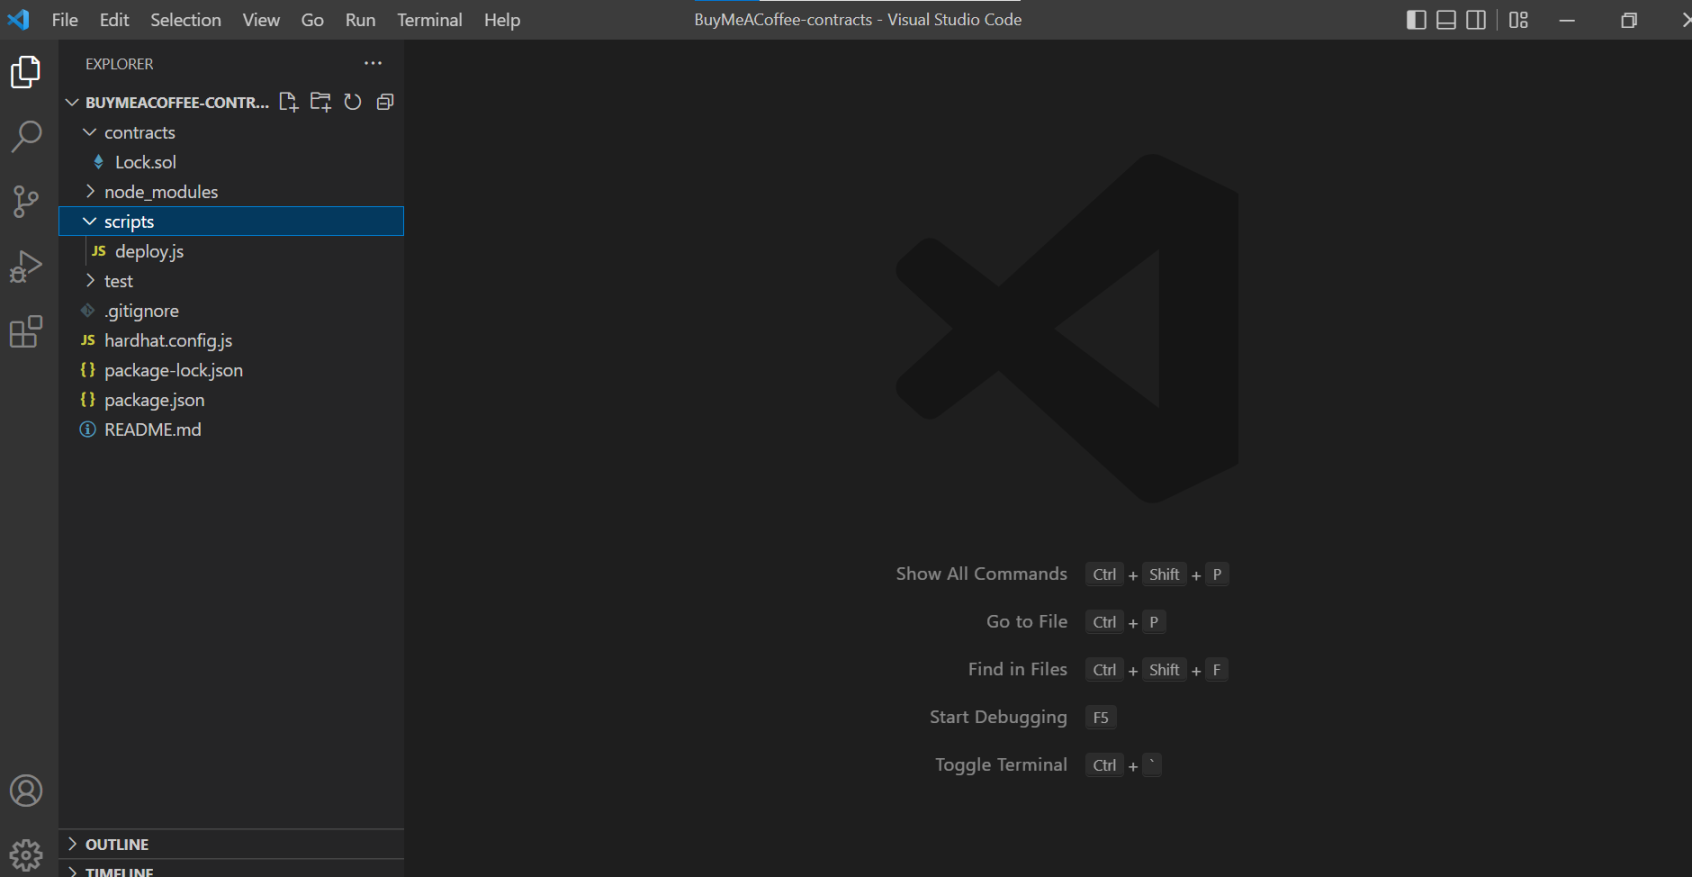
9.打开后如图所示。
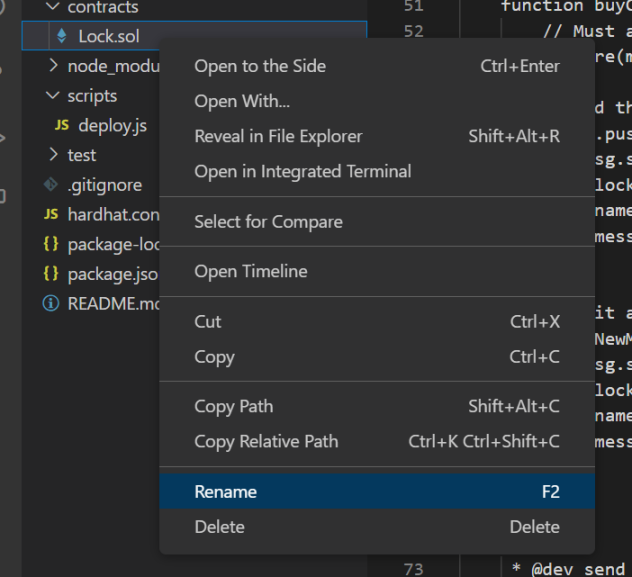
10.右键 rename 将合约文件 lock.sol 重命名为 BuyMeACoffee.sol
11.BuyMeACoffee.sol代码替换成下面的并保存!(不保存没用啊,要点保存)
//SPDX-License-Identifier: Unlicense// contracts/BuyMeACoffee.solpragma solidity ^0.8.0;// Switch this to your own contract address once deployed, for bookkeeping!// Example Contract Address on Goerli: 0xDBa03676a2fBb6711CB652beF5B7416A53c1421Dcontract BuyMeACoffee { // Event to emit when a Memo is created. event NewMemo( address indexed from, uint256 timestamp, string name, string message ); // Memo struct. struct Memo { address from; uint256 timestamp; string name; string message; } // Address of contract deployer. Marked payable so that // we can withdraw to this address later. address payable owner; // List of all memos received from coffee purchases. Memo[] memos; constructor() { // Store the address of the deployer as a payable address. // When we withdraw funds, we'll withdraw here. owner = payable(msg.sender); } /** * @dev fetches all stored memos */ function getMemos() public view returns (Memo[] memory) { return memos; } /** * @dev buy a coffee for owner (sends an ETH tip and leaves a memo) * @param _name name of the coffee purchaser * @param _message a nice message from the purchaser */ function buyCoffee(string memory _name, string memory _message) public payable { // Must accept more than 0 ETH for a coffee. require(msg.value > 0, "can't buy coffee for free!"); // Add the memo to storage! memos.push(Memo( msg.sender, block.timestamp, _name, _message )); // Emit a NewMemo event with details about the memo. emit NewMemo( msg.sender, block.timestamp, _name, _message ); } /** * @dev send the entire balance stored in this contract to the owner */ function withdrawTips() public { require(owner.send(address(this).balance)); }}step3 创建一个 buy-coffee.js 脚本来测试你的合约
1.将 deploy.js 重命名为buy-coffee.js
并将代码替换成下面的:(不保存没用啊,要点保存)
const hre = require("hardhat");// Returns the Ether balance of a given address.async function getBalance(address) { const balanceBigInt = await hre.ethers.provider.getBalance(address); return hre.ethers.utils.formatEther(balanceBigInt);}// Logs the Ether balances for a list of addresses.async function printBalances(addresses) { let idx = 0; for (const address of addresses) { console.log(`Address ${idx} balance: `, await getBalance(address)); idx ++; }}// Logs the memos stored on-chain from coffee purchases.async function printMemos(memos) { for (const memo of memos) { const timestamp = memo.timestamp; const tipper = memo.name; const tipperAddress = memo.from; const message = memo.message; console.log(`At ${timestamp}, ${tipper} (${tipperAddress}) said: "${message}"`); }}async function main() { // Get the example accounts we'll be working with. const [owner, tipper, tipper2, tipper3] = await hre.ethers.getSigners(); // We get the contract to deploy. const BuyMeACoffee = await hre.ethers.getContractFactory("BuyMeACoffee"); const buyMeACoffee = await BuyMeACoffee.deploy(); // Deploy the contract. await buyMeACoffee.deployed(); console.log("BuyMeACoffee deployed to:", buyMeACoffee.address); // Check balances before the coffee purchase. const addresses = [owner.address, tipper.address, buyMeACoffee.address]; console.log("== start =="); await printBalances(addresses); // Buy the owner a few coffees. const tip = {value: hre.ethers.utils.parseEther("1")}; await buyMeACoffee.connect(tipper).buyCoffee("Carolina", "You're the best!", tip); await buyMeACoffee.connect(tipper2).buyCoffee("Vitto", "Amazing teacher", tip); await buyMeACoffee.connect(tipper3).buyCoffee("Kay", "I love my Proof of Knowledge", tip); // Check balances after the coffee purchase. console.log("== bought coffee =="); await printBalances(addresses); // Withdraw. await buyMeACoffee.connect(owner).withdrawTips(); // Check balances after withdrawal. console.log("== withdrawTips =="); await printBalances(addresses); // Check out the memos. console.log("== memos =="); const memos = await buyMeACoffee.getMemos(); printMemos(memos);}// We recommend this pattern to be able to use async/await everywhere// and properly handle errors.main() .then(() => process.exit(0)) .catch((error) => { console.error(error); process.exit(1); });如果你粘贴的是官网的,记得把第五行那个位置换成 ethers!!!(如下图所示)

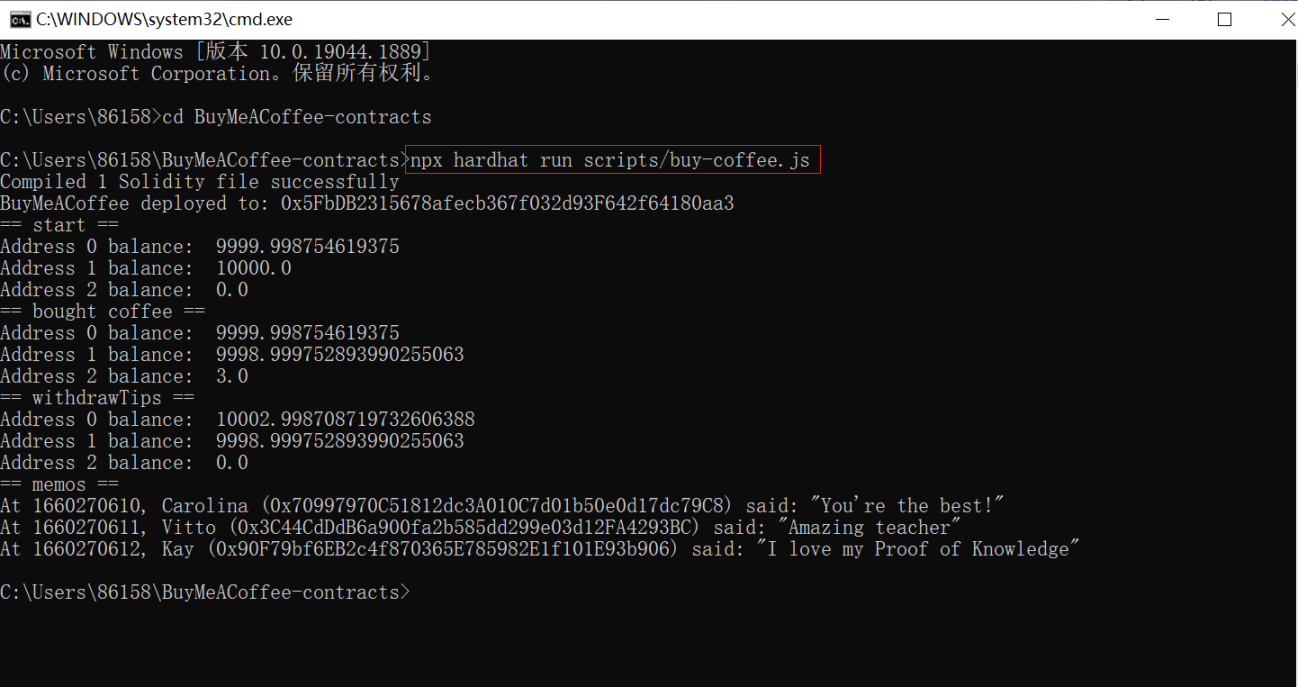
2.在控制台输入 npx hardhat run scripts/buy-coffee.js,出现下图就对了。
step4 使用 Alchemy 和 MetaMask 将您的 BuyMeACoffe.sol 智能合约部署到以太坊 Goerli 测试网
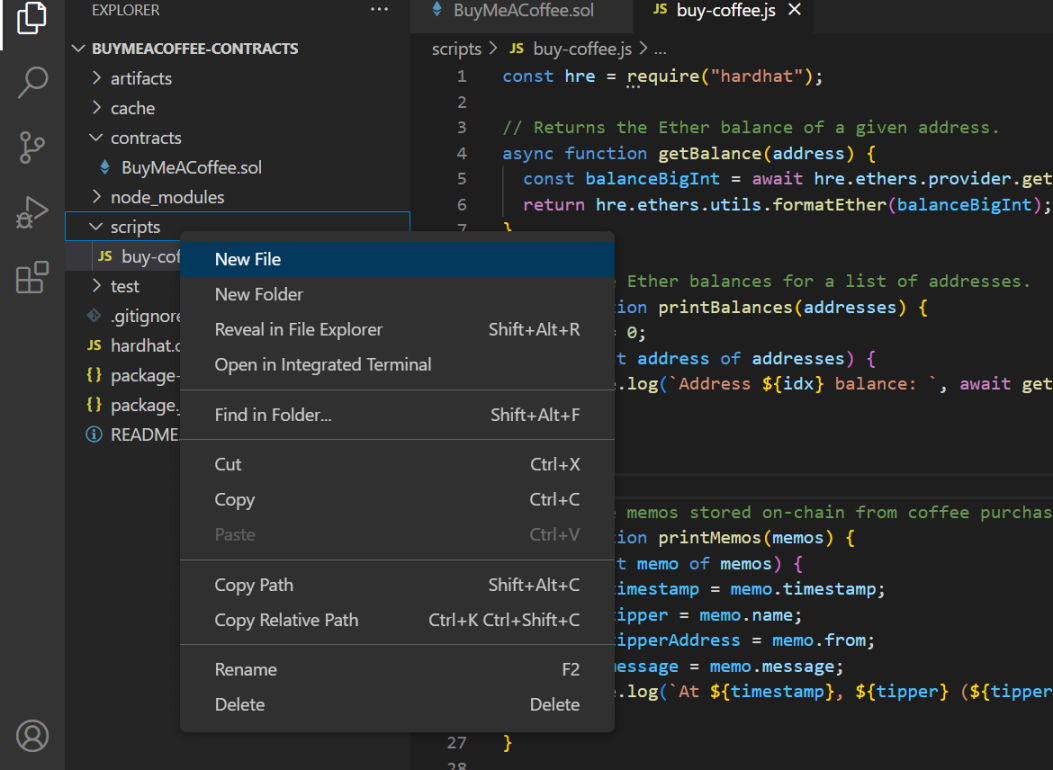
1.右键点击 scipts,点击 new file,创建一个名为 deploy.js 的文件。

2.在 deploy.js 中粘贴以下代码。(不保存没用啊,要点保存)
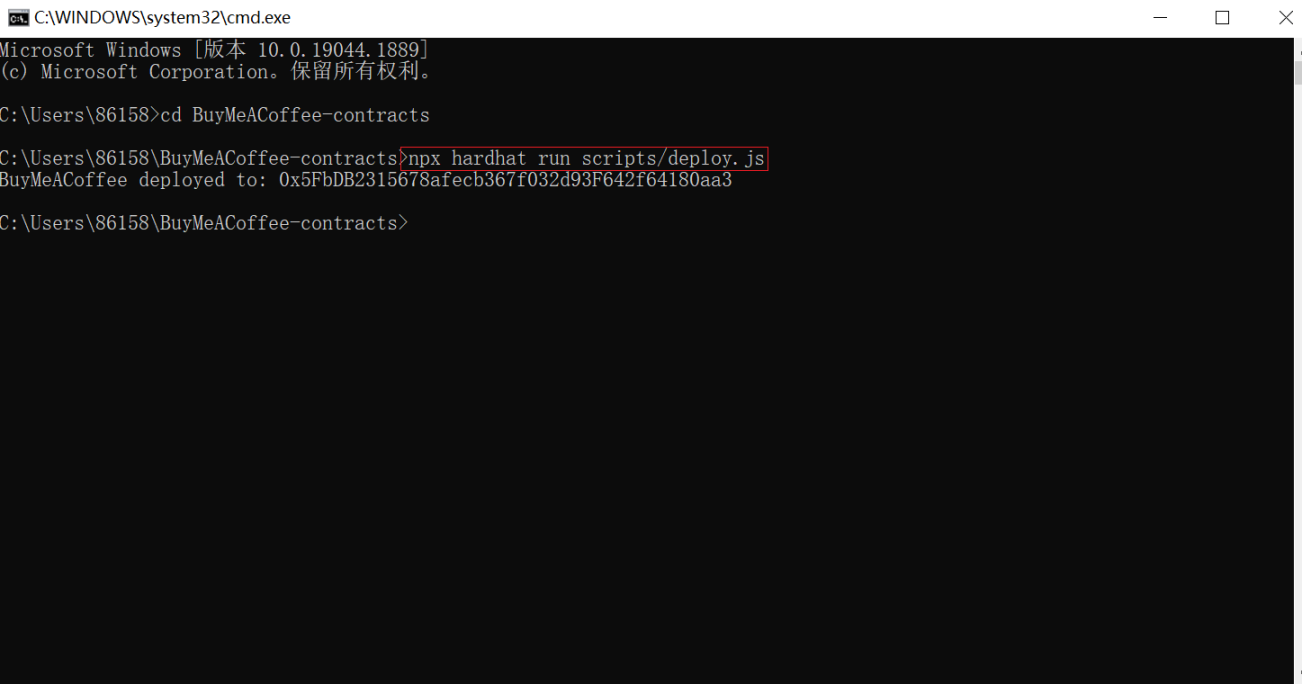
// scripts/deploy.jsconst hre = require("hardhat");async function main() { // We get the contract to deploy. const BuyMeACoffee = await hre.ethers.getContractFactory("BuyMeACoffee"); const buyMeACoffee = await BuyMeACoffee.deploy(); await buyMeACoffee.deployed(); console.log("BuyMeACoffee deployed to:", buyMeACoffee.address);}// We recommend this pattern to be able to use async/await everywhere// and properly handle errors.main() .then(() => process.exit(0)) .catch((error) => { console.error(error); process.exit(1); });3.在控制台输入 npx hardhat run scripts/deploy.js ,并按回车,出现下面那句 BuyMeACoffee deployed to: 0x5FbDB2315678afecb367f032d93F642f64180aa3 就对了。
4.打开你的 hardhat.config.js文件,您将看到一些示例部署代码。 删除它并将此版本粘贴到其中。记得保存。
// hardhat.config.jsrequire("@nomiclabs/hardhat-ethers");require("@nomiclabs/hardhat-waffle");require("dotenv").config()// You need to export an object to set up your config// Go to https://hardhat.org/config/ to learn moreconst GOERLI_URL = process.env.GOERLI_URL;const PRIVATE_KEY = process.env.PRIVATE_KEY;/** * @type import('hardhat/config').HardhatUserConfig */module.exports = { solidity: "0.8.4", networks: { goerli: { url: GOERLI_URL, accounts: [PRIVATE_KEY] } }};5.在控制台输入 npm install dotenv,安装 dotenv。如图所示。

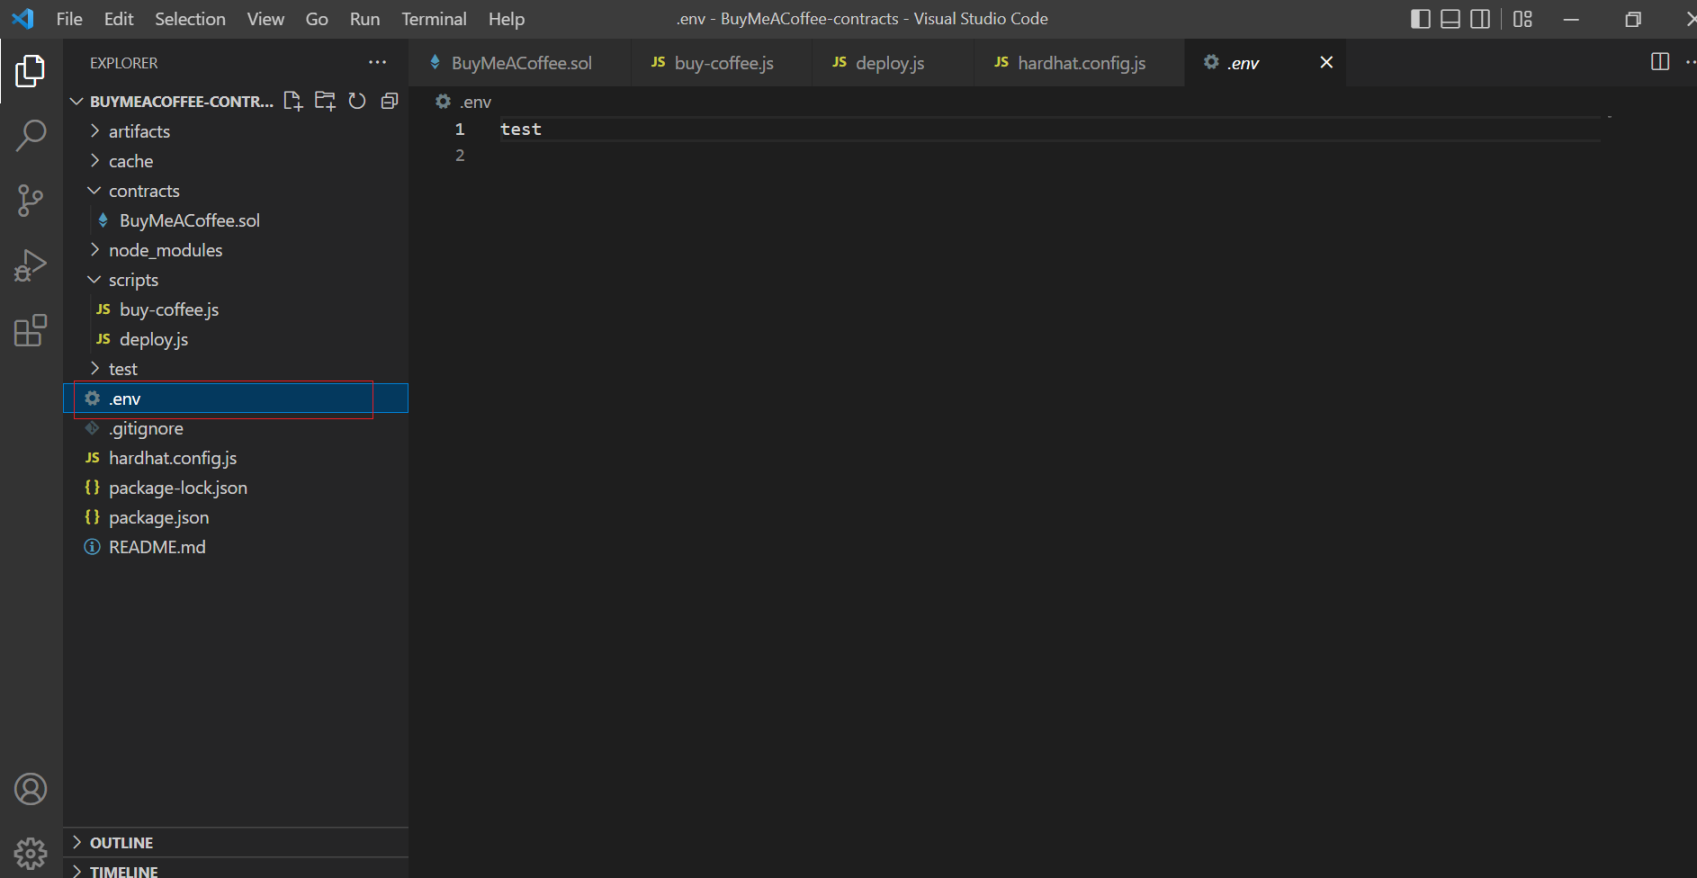
6.在控制台输入 echo test>.env 创建一个.env 文件
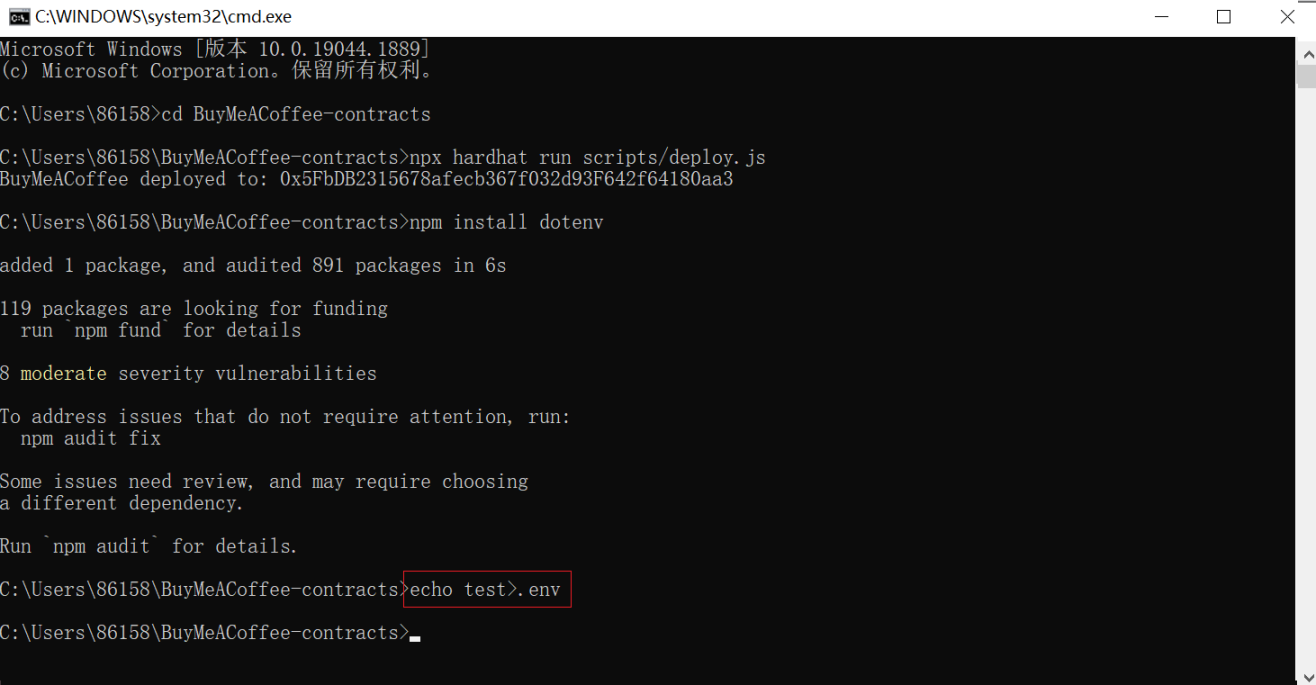
在这里可以看到。
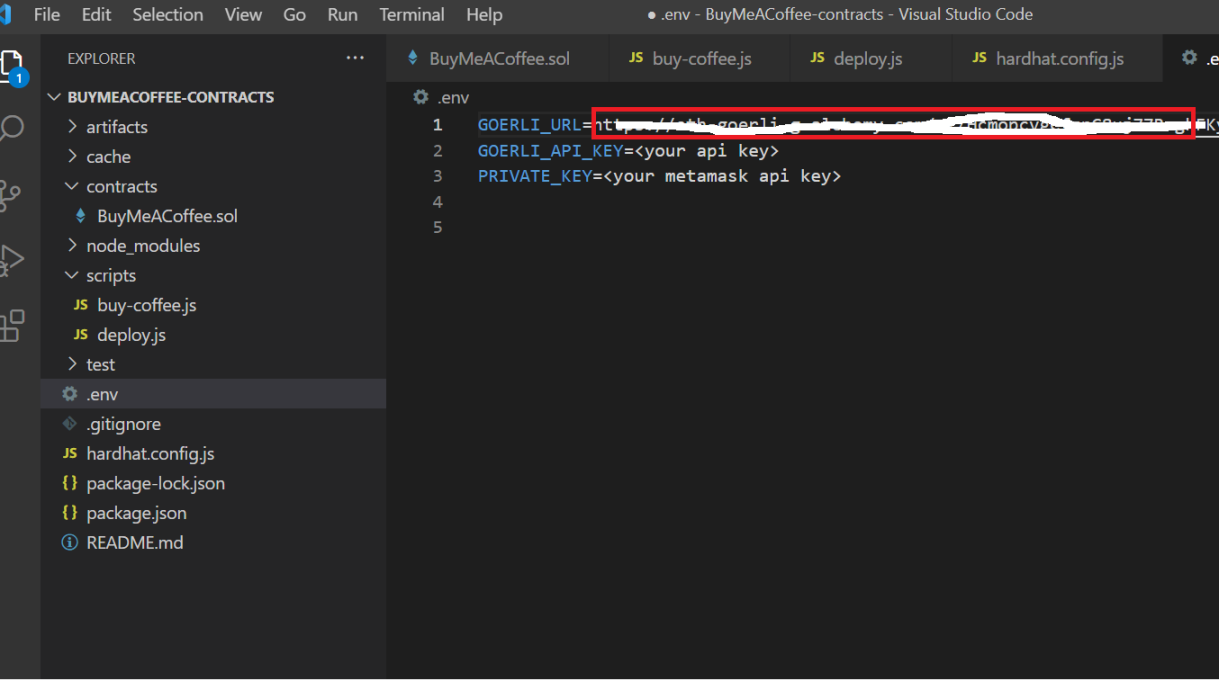
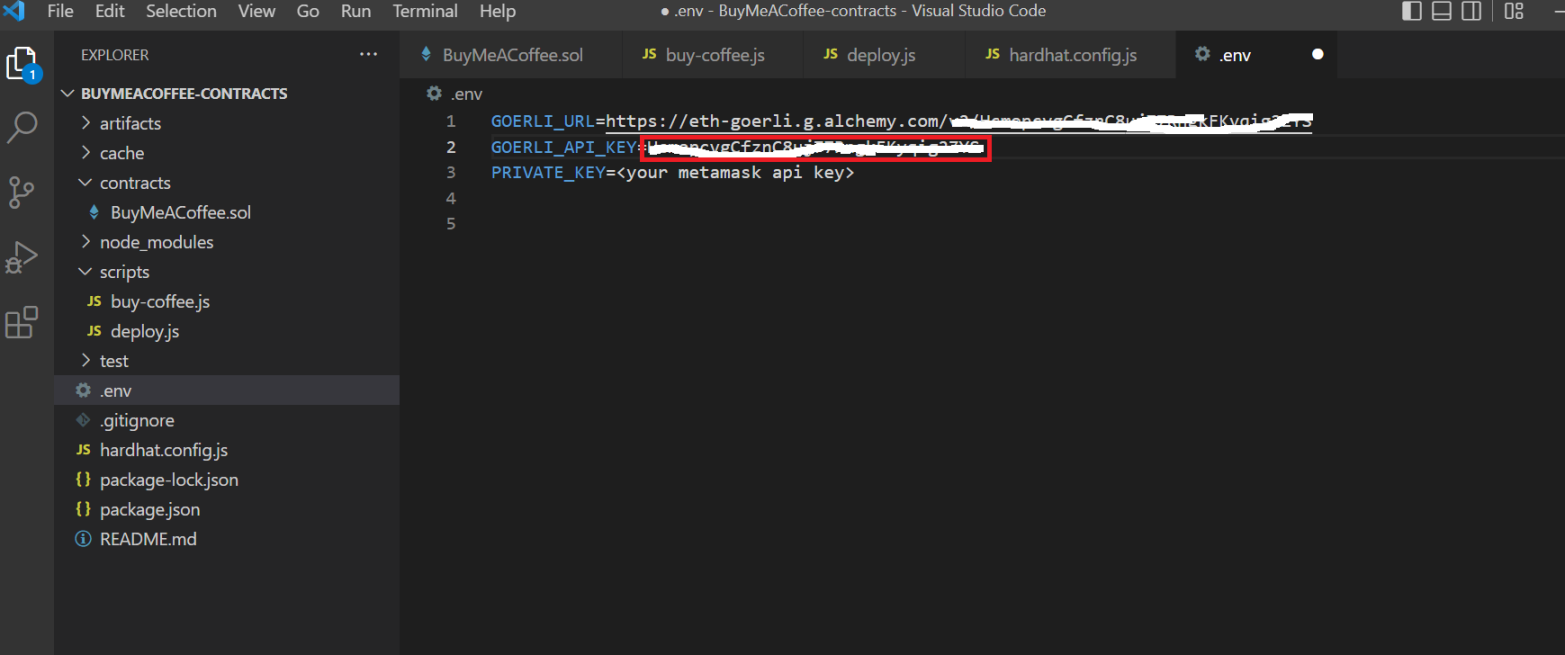
7.将以下代码粘贴进.env
GOERLI_URL=https://eth-goerli.alchemyapi.io/v2/<your api key>GOERLI_API_KEY=<your api key>PRIVATE_KEY=<your metamask api key>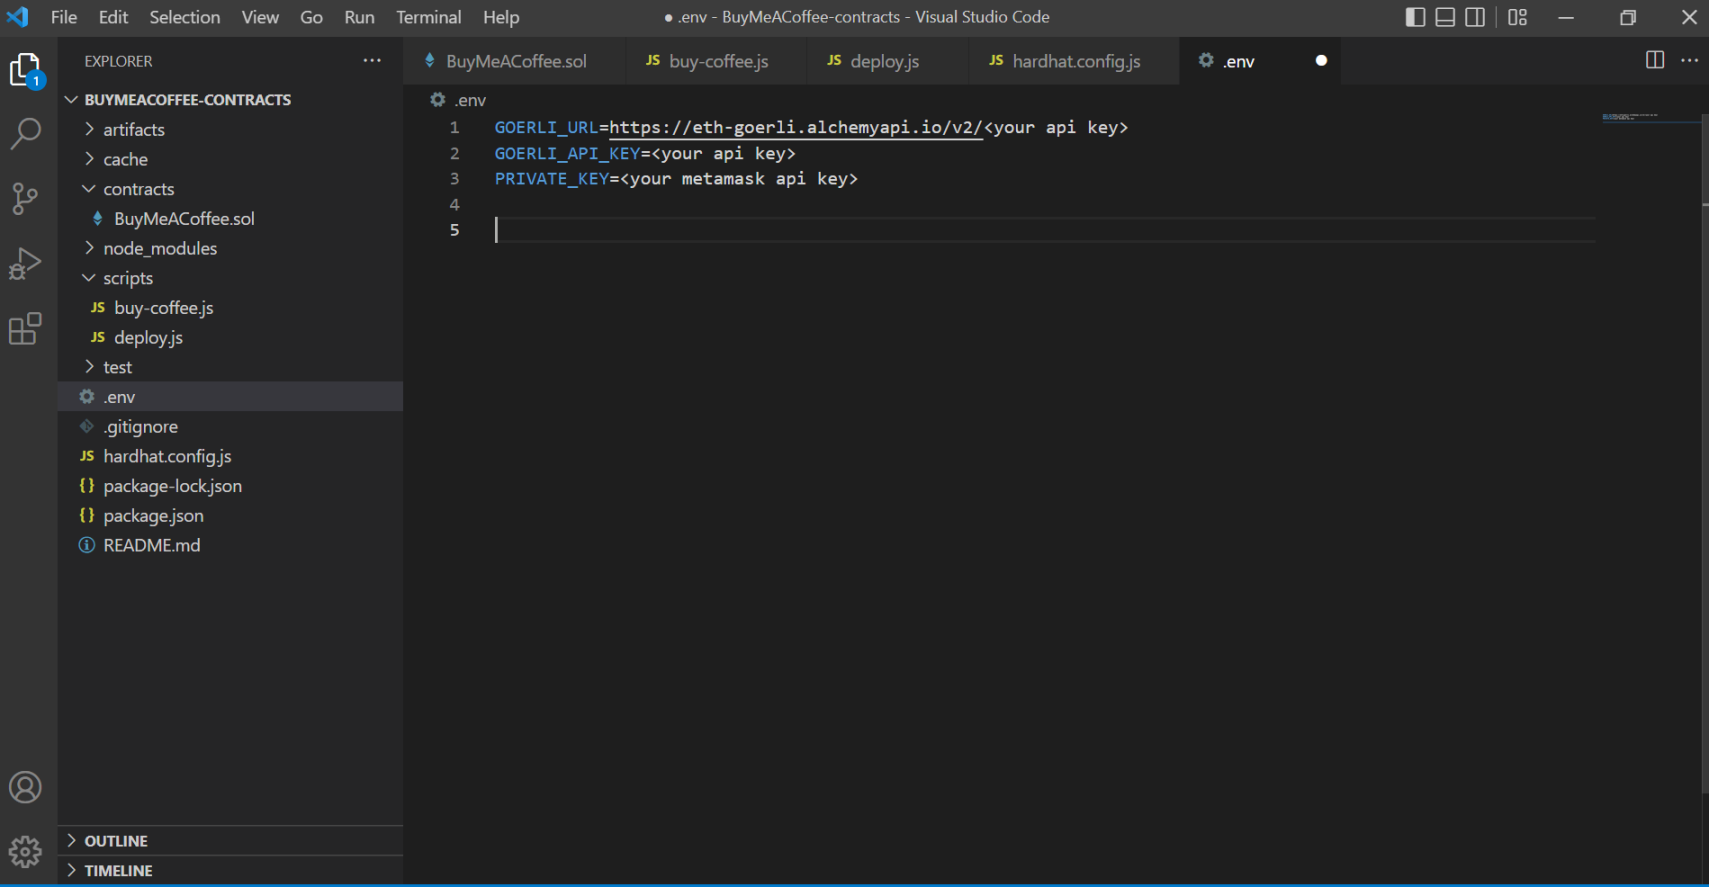
注意:第 7 步的这三行代码不是最终的,三行全部要换成自己对应的链接,在哪里找,往下看。
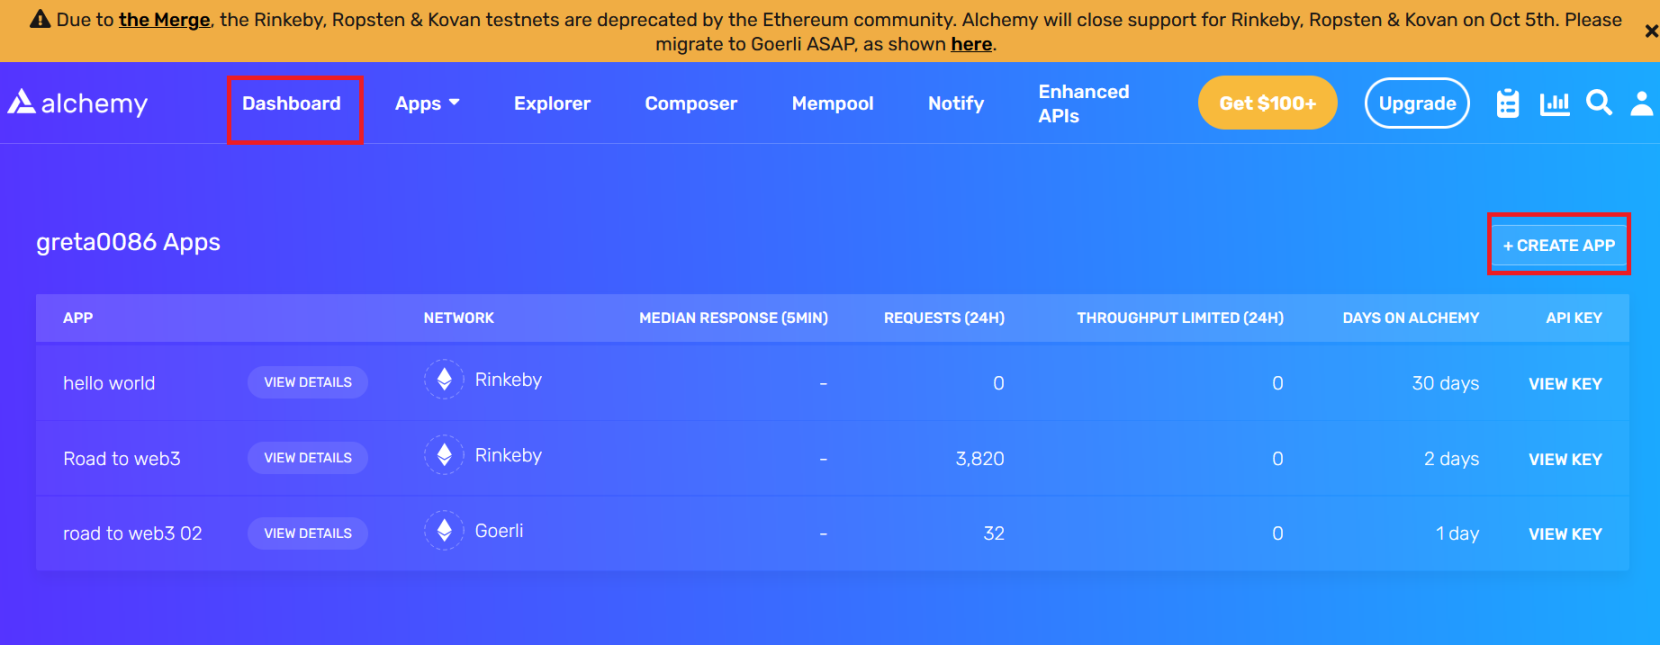
8.替换 GOERLI_URL。
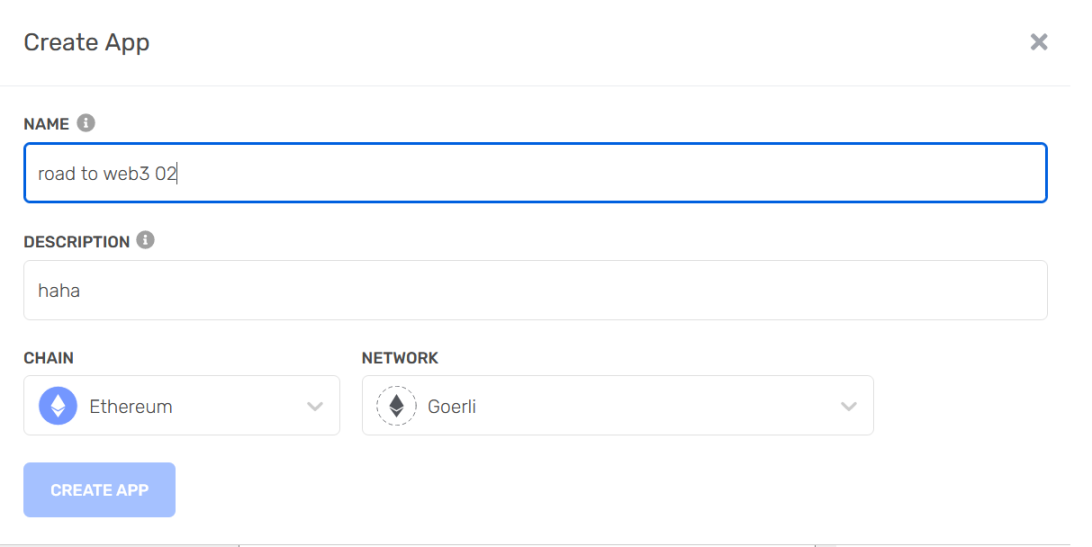
注册一个 Alchemy帐户。进入 dashboard,点击 create app。
然后如下设置,点击 create app。
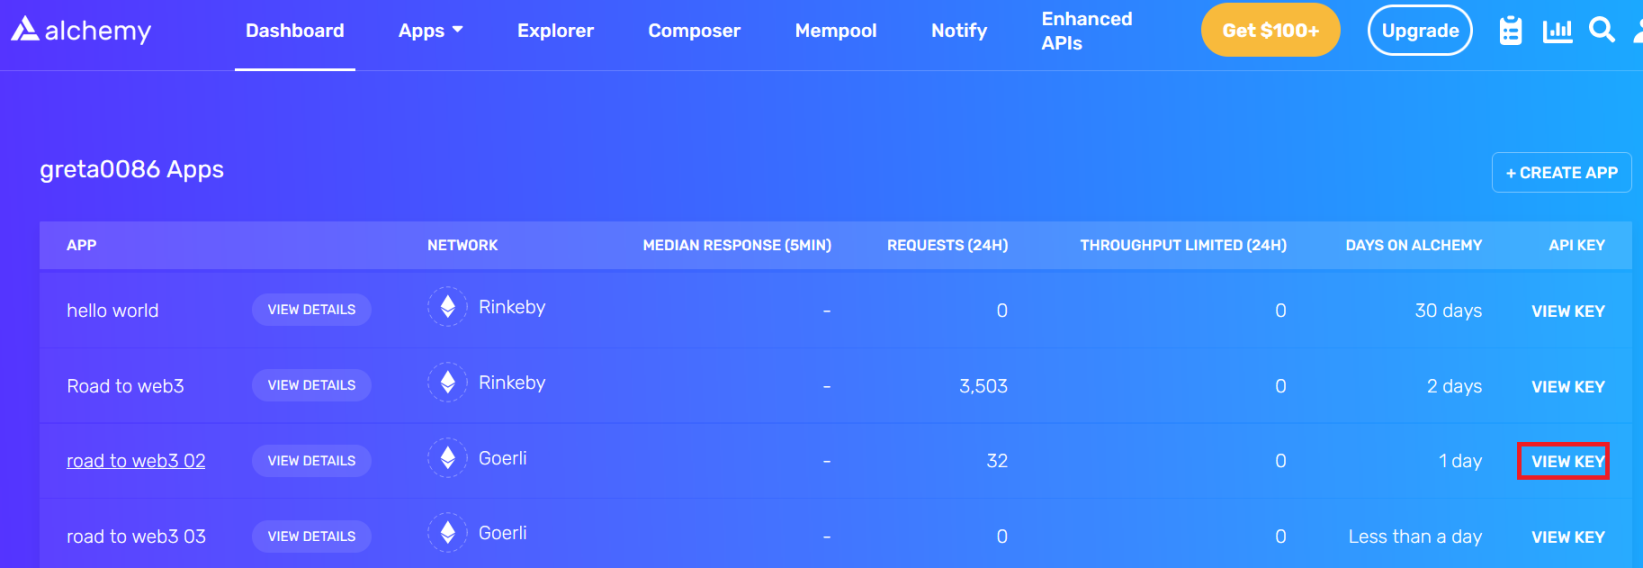
点击 view key
复制 HTTPS 的框内内容,切换到 vscode,粘贴到如下位置。
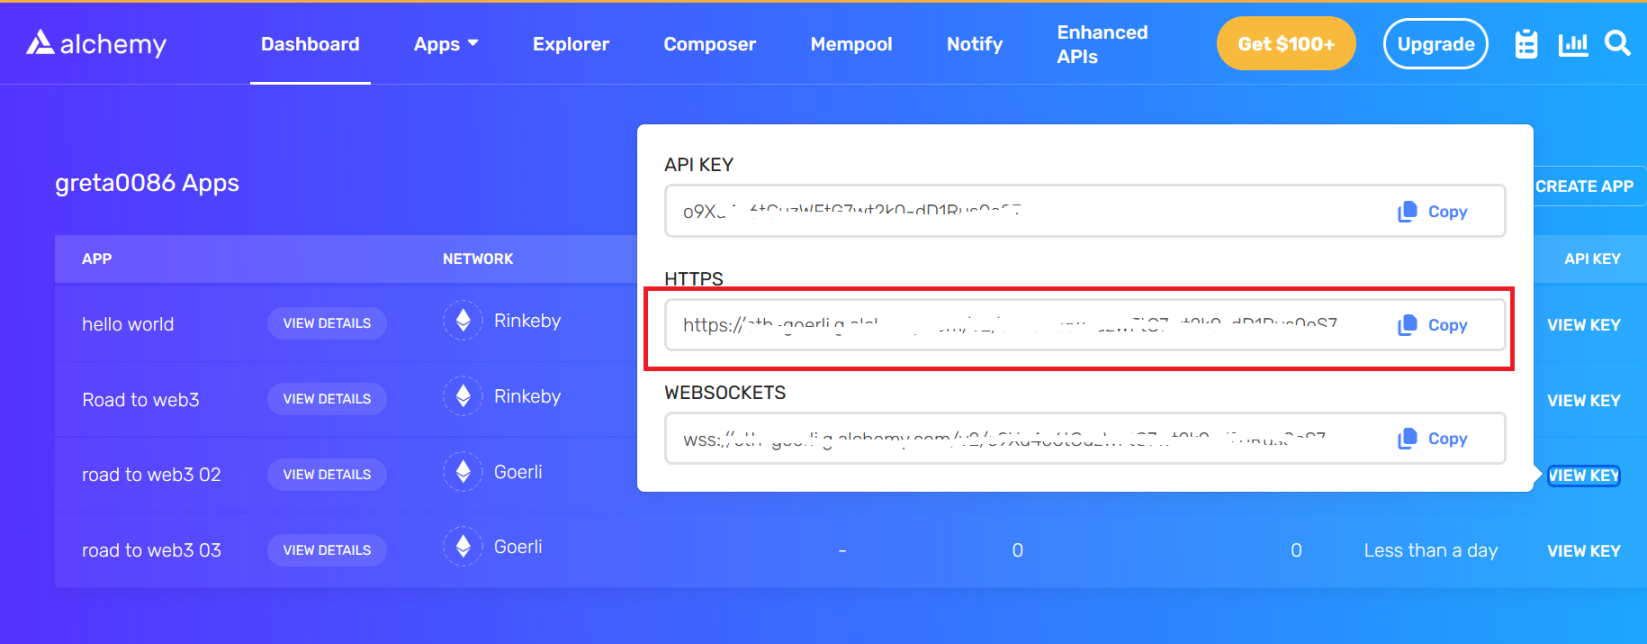
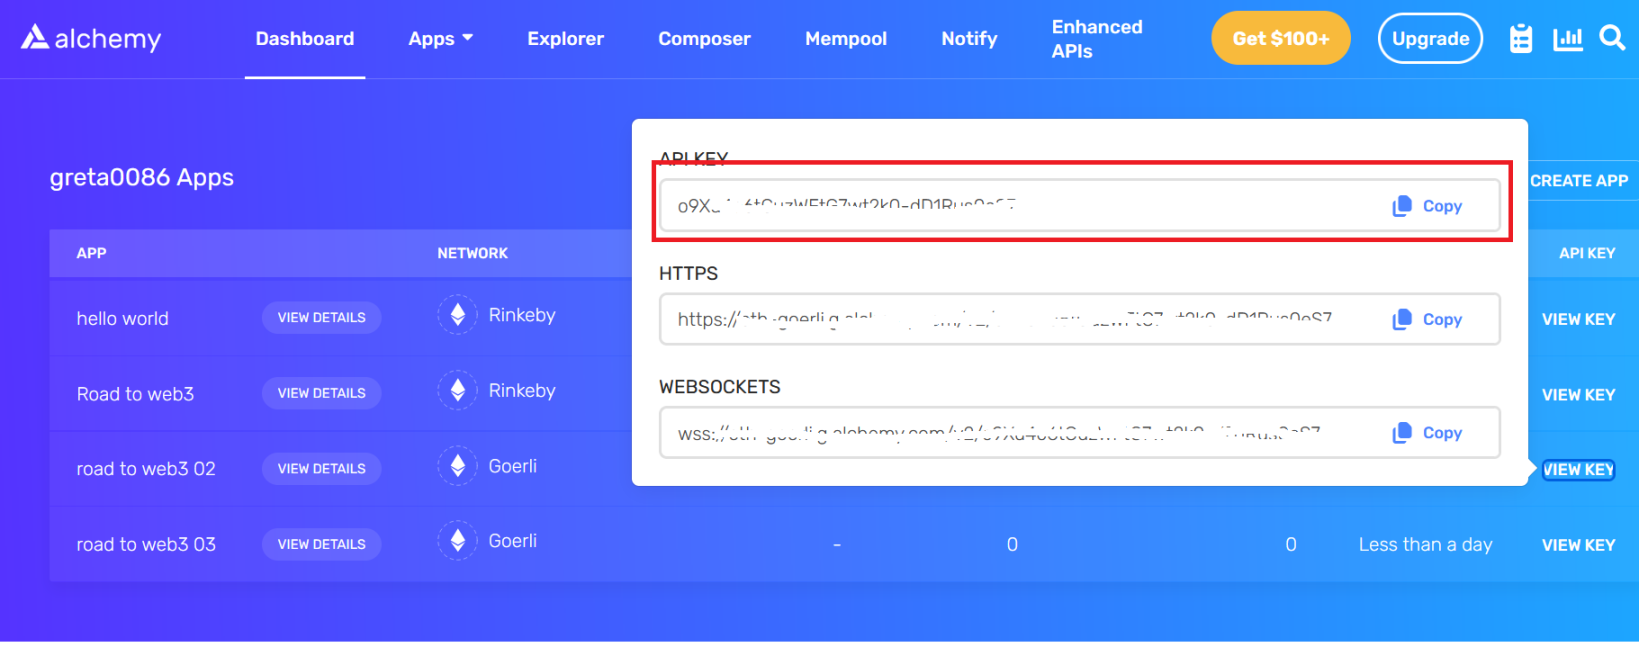
9.替换 GOERLI_API_KEY。
将 API KEY 框内内容复制,然后切换到 vscode 粘贴到如下位置。
10.替换 PRIVATE_KEY。
点击 metamask 右上角三个点,然后点击账户详情。
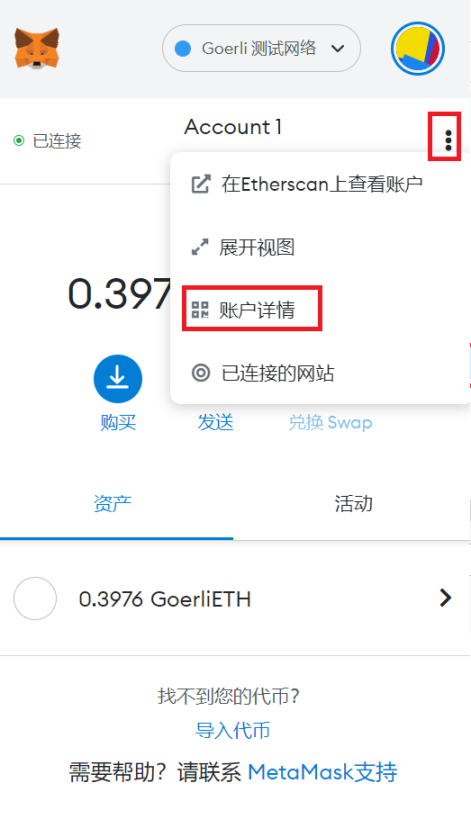
点击导出私钥。

将下图内容复制。
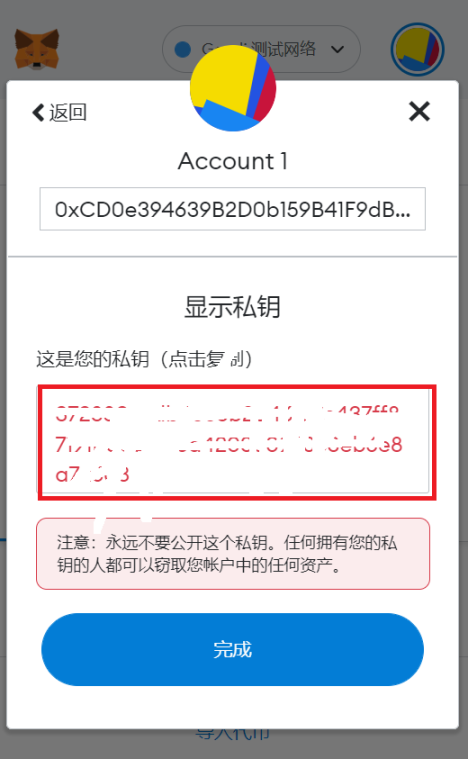
粘贴到这里,然后保存。

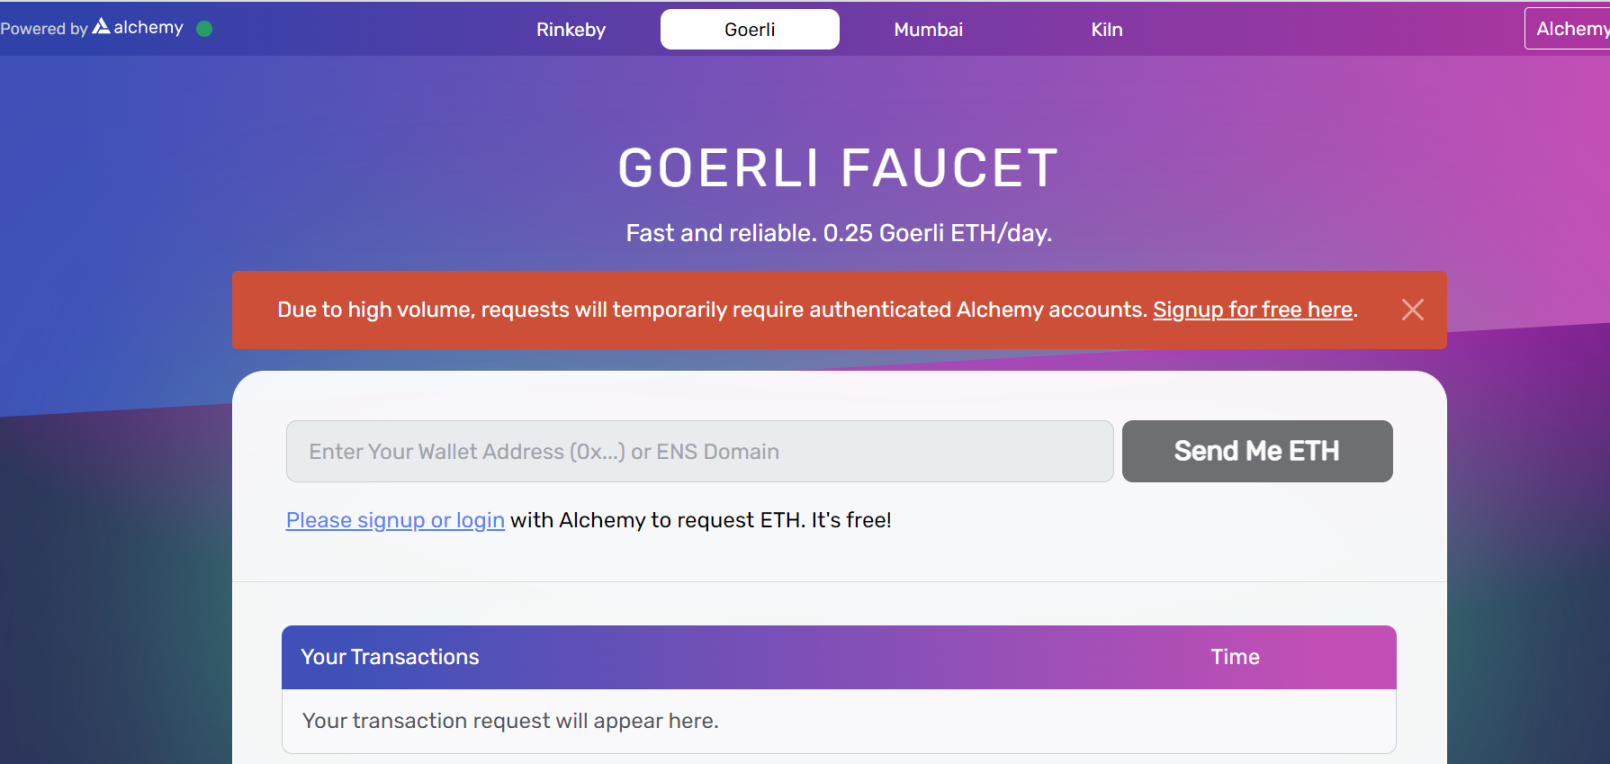
11.访问 https://www.goerlifaucet.com 并使用您的 Alchemy 帐户登录以获得一些免费的测试以太币。
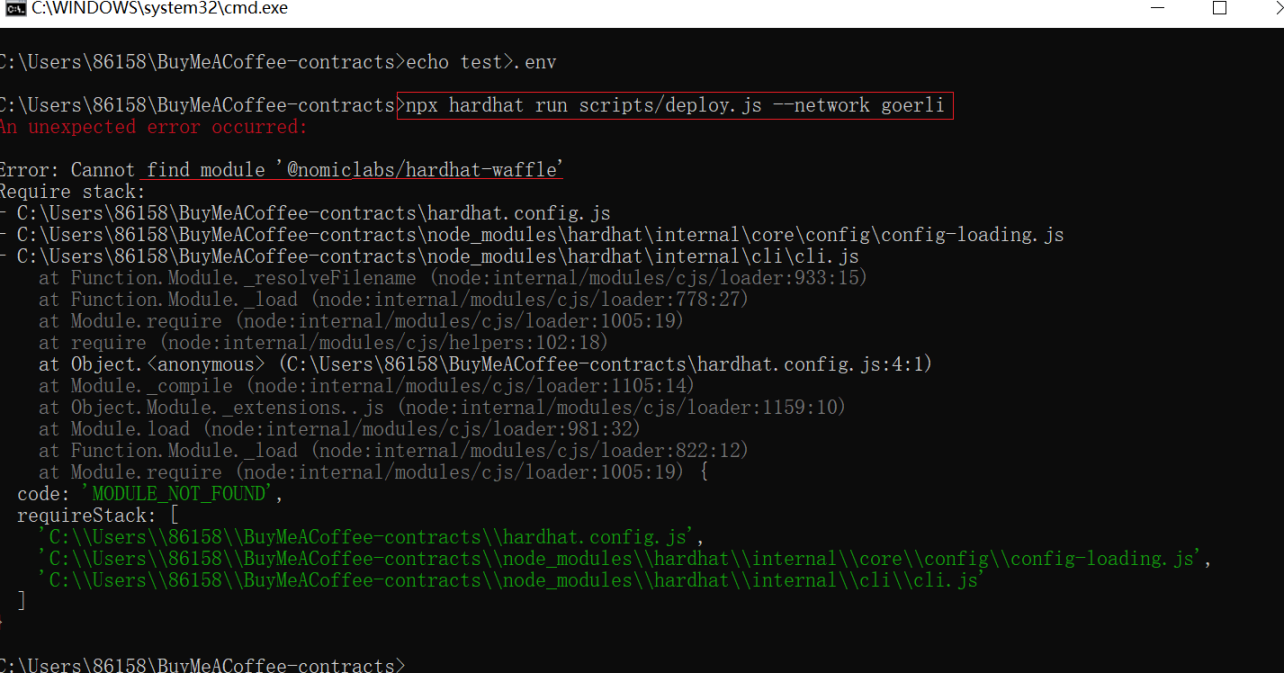
12.运行部署脚本 npx hardhat run scripts/deploy.js –network goerli ,发现报错,把缺的这个装上去就好了,见 13 步。
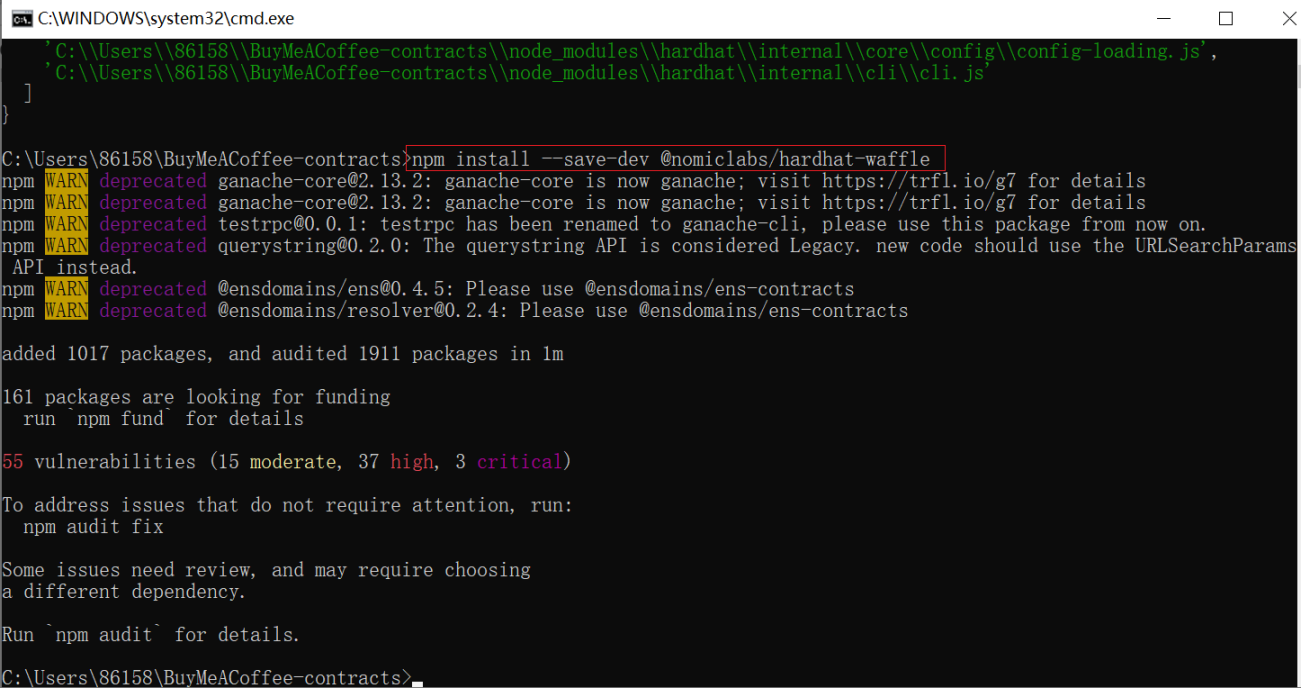
13.直接输入 npm install –save-dev @nomiclabs/hardhat-waffle 安装第 11 步的缺的包。安装时有一堆 warn 不需要管。
14.再运行 npx hardhat run scripts/deploy.js –network goerli ,出现下面那行 BuyMeACoffee deployed to: 某个地址(这个地址记得复制粘贴下来)就对了。

step5 实施一个 withdraw 脚本
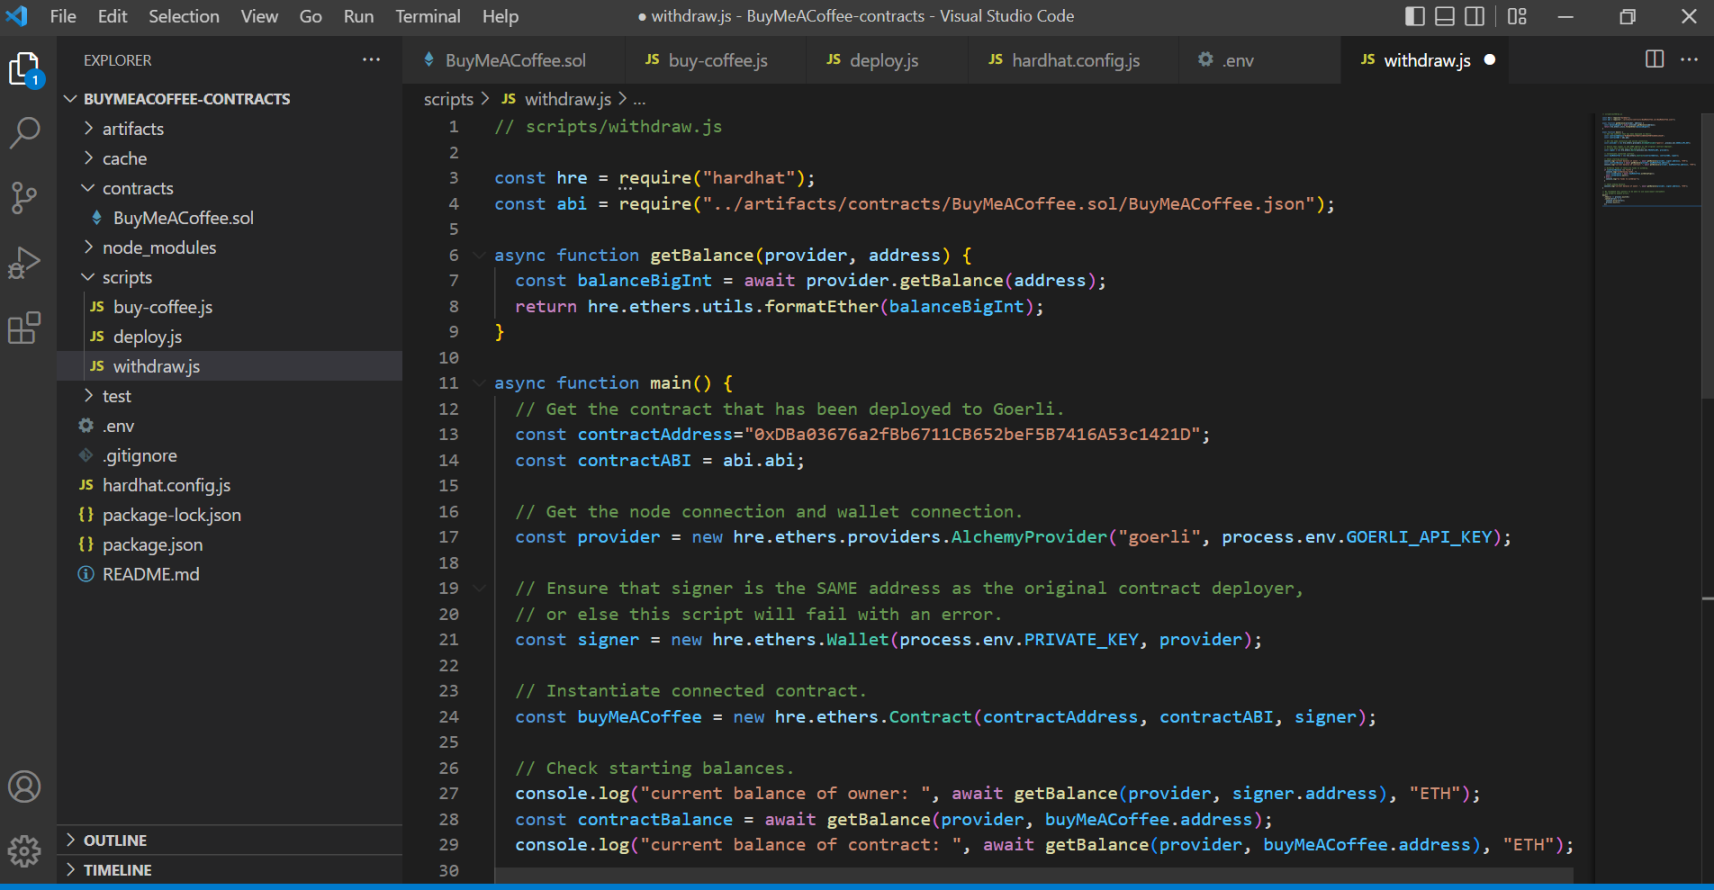
1.右键点击 script 创建 withdraw.js 文件,将下列代码粘贴进去。
// scripts/withdraw.jsconst hre = require("hardhat");const abi = require("../artifacts/contracts/BuyMeACoffee.sol/BuyMeACoffee.json");async function getBalance(provider, address) { const balanceBigInt = await provider.getBalance(address); return hre.ethers.utils.formatEther(balanceBigInt);}async function main() { // Get the contract that has been deployed to Goerli. const contractAddress="0xDBa03676a2fBb6711CB652beF5B7416A53c1421D"; const contractABI = abi.abi; // Get the node connection and wallet connection. const provider = new hre.ethers.providers.AlchemyProvider("goerli", process.env.GOERLI_API_KEY); // Ensure that signer is the SAME address as the original contract deployer, // or else this script will fail with an error. const signer = new hre.ethers.Wallet(process.env.PRIVATE_KEY, provider); // Instantiate connected contract. const buyMeACoffee = new hre.ethers.Contract(contractAddress, contractABI, signer); // Check starting balances. console.log("current balance of owner: ", await getBalance(provider, signer.address), "ETH"); const contractBalance = await getBalance(provider, buyMeACoffee.address); console.log("current balance of contract: ", await getBalance(provider, buyMeACoffee.address), "ETH"); // Withdraw funds if there are funds to withdraw. if (contractBalance !== "0.0") { console.log("withdrawing funds..") const withdrawTxn = await buyMeACoffee.withdrawTips(); await withdrawTxn.wait(); } else { console.log("no funds to withdraw!"); } // Check ending balance. console.log("current balance of owner: ", await getBalance(provider, signer.address), "ETH");}// We recommend this pattern to be able to use async/await everywhere// and properly handle errors.main() .then(() => process.exit(0)) .catch((error) => { console.error(error); process.exit(1); });如图所示,记得保存。
2.在控制台输入 npx hardhat run scripts/withdraw.js ,运行后如下图就行。

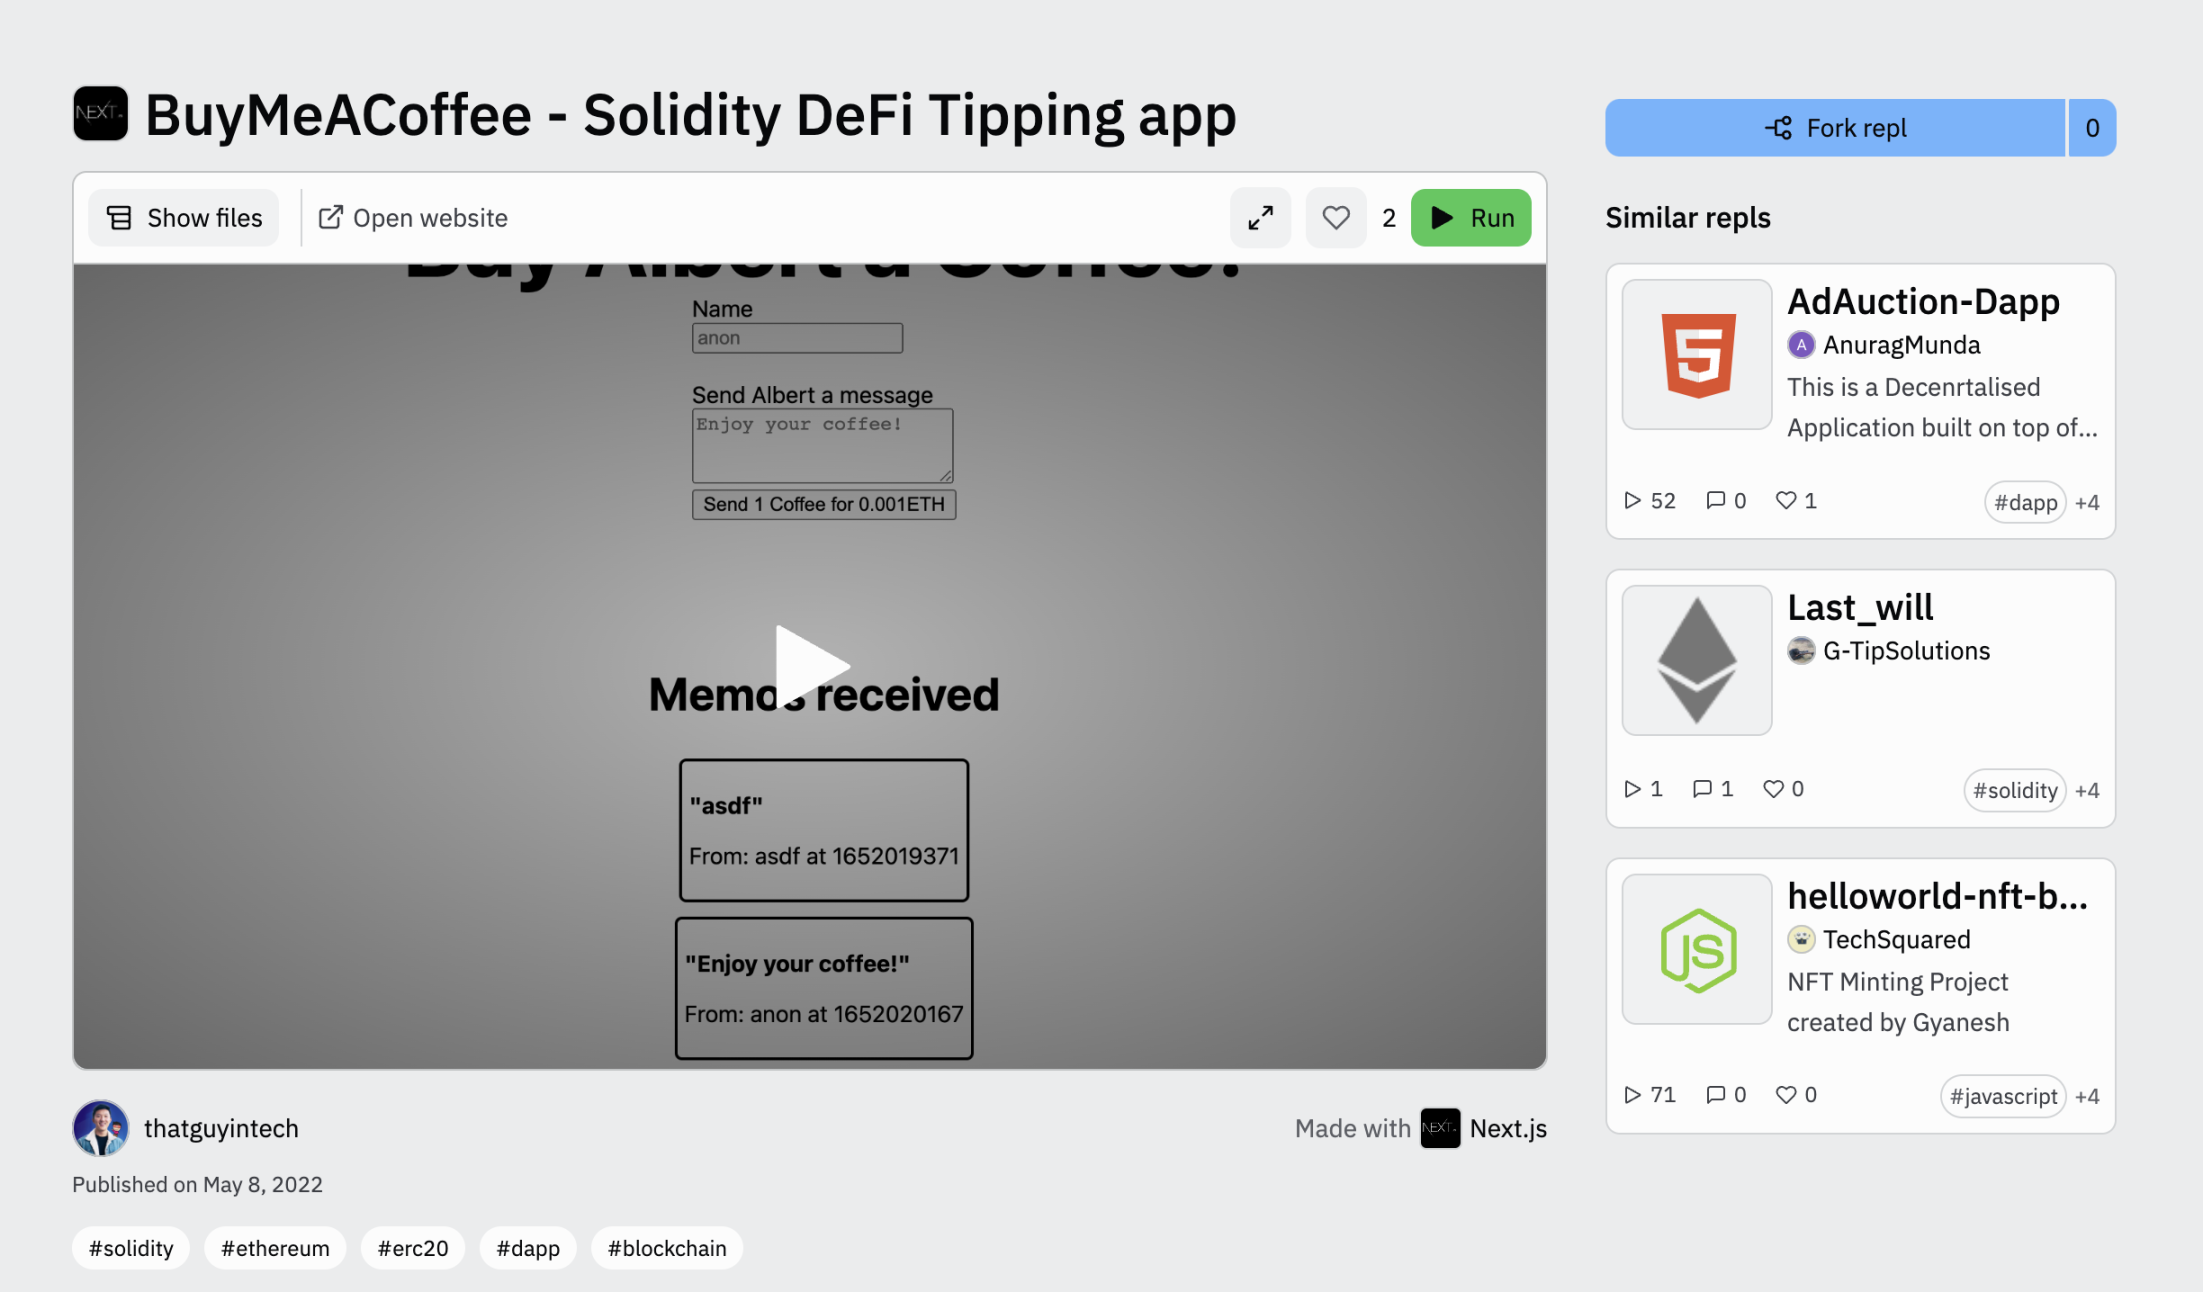
step6 使用 Replit 和 Ethers.js 构建前端 Buy Me A Coffee 网站 dapp
1.在此处访问官方示例项目,并创建您自己的副本以进行修改: 官方示例项目
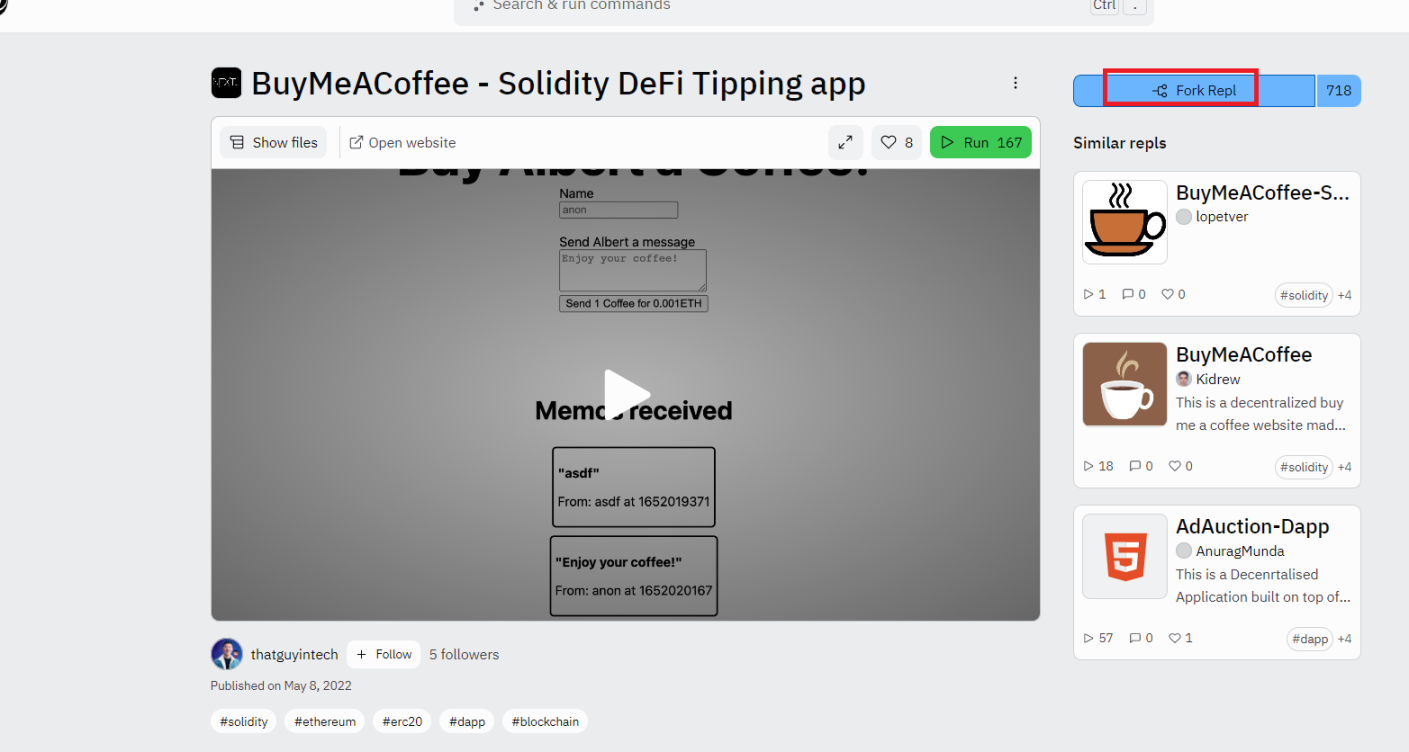
2.点击 fork repl。
3.进入该界面,没用过 replit 的要注册一下。
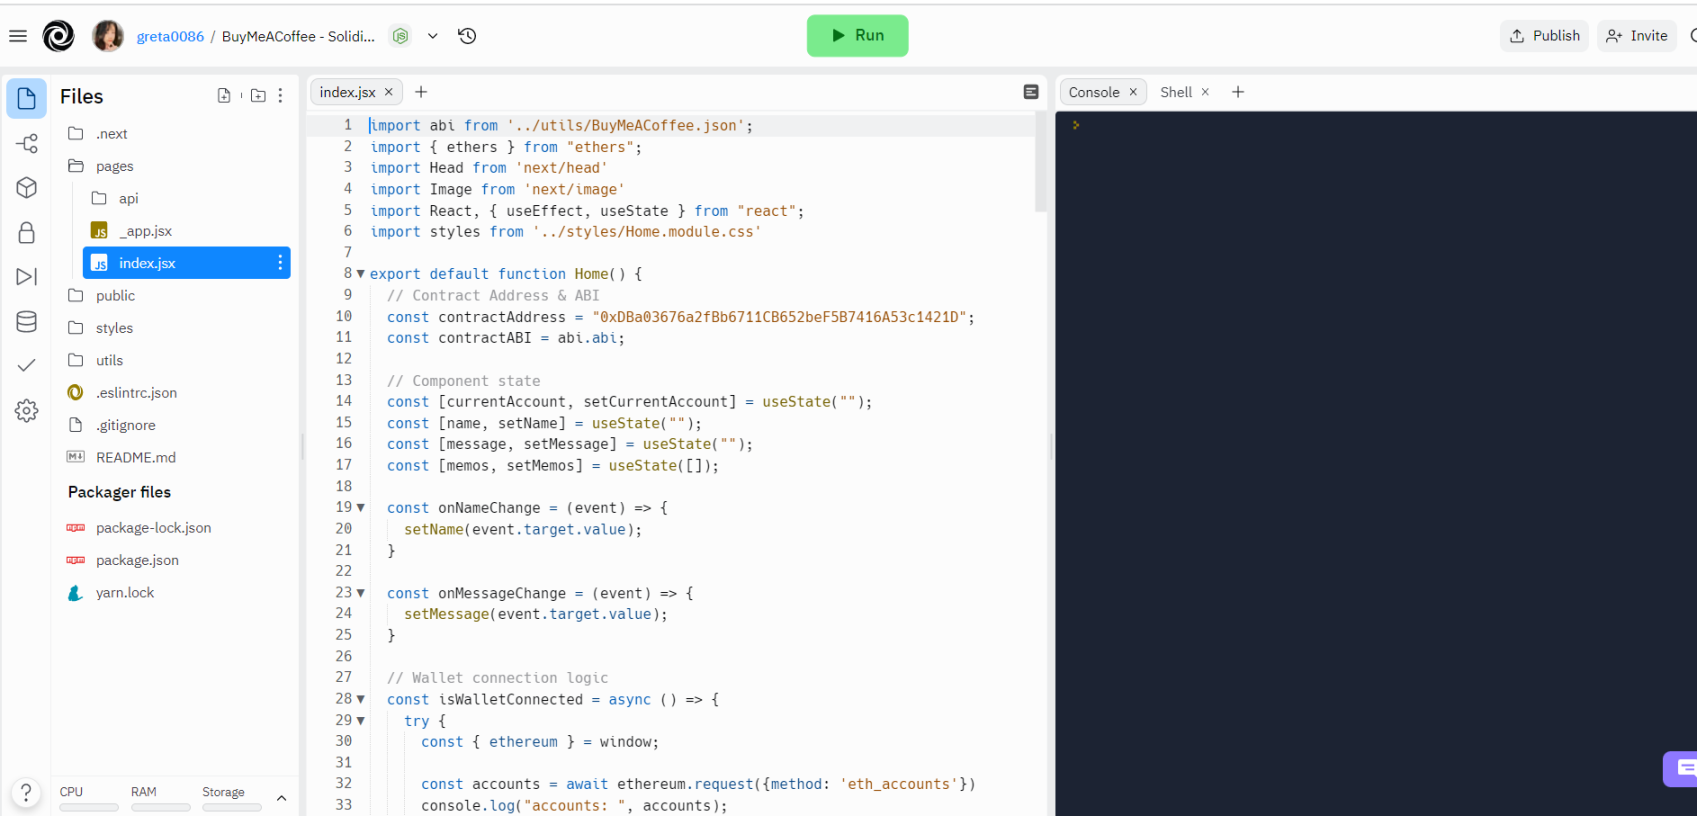
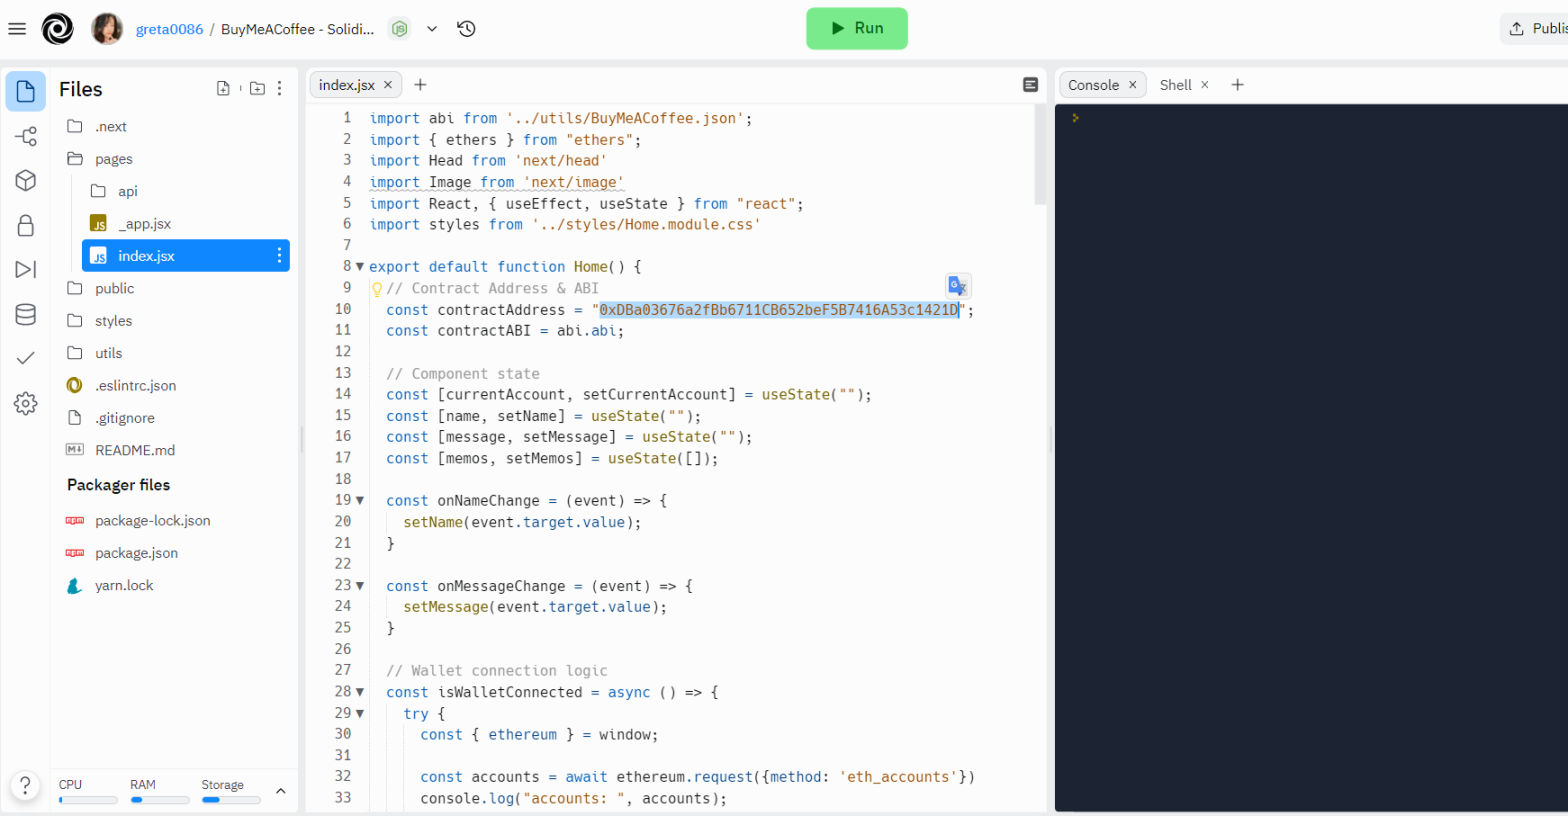
4.下面那一串合约地址换成你在 step4 的第 14 步得到的 BuyMeACoffee deployed to:冒号后面的地址。
5.在 pages/index.js 中按 ctrl+f 将名称字符串更新为您自己的名称。
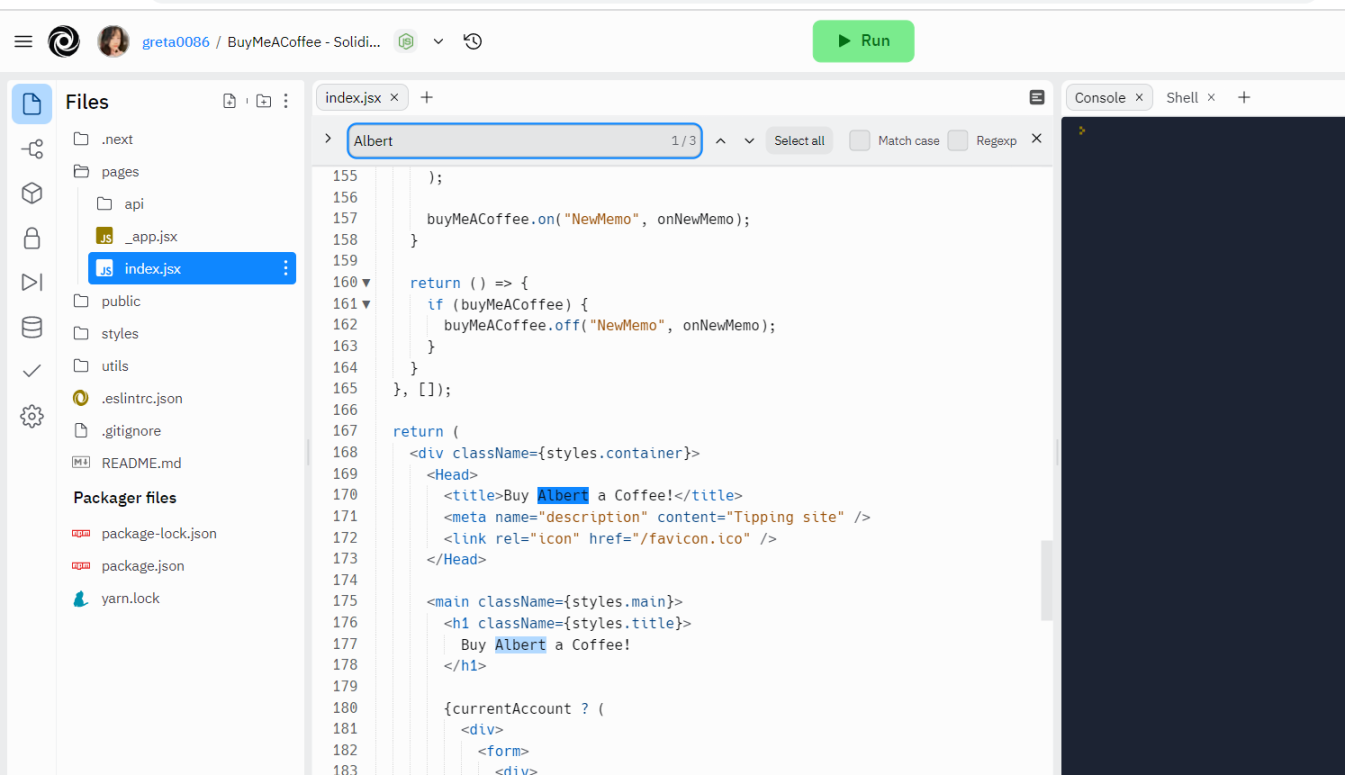
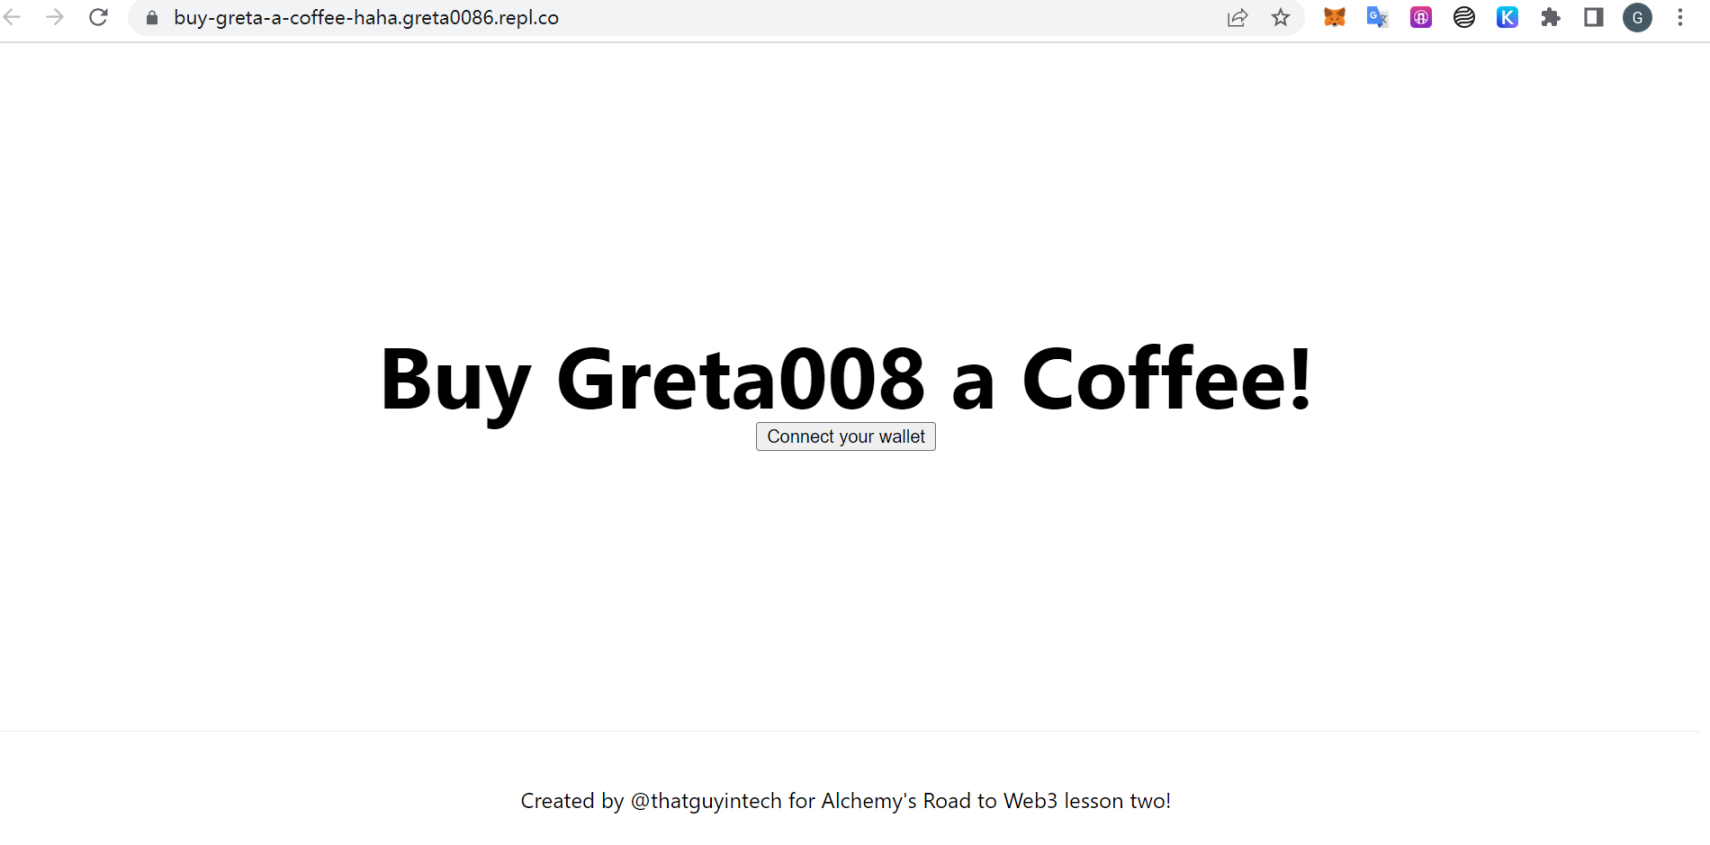
6.点击 run,出现如图所示即可。

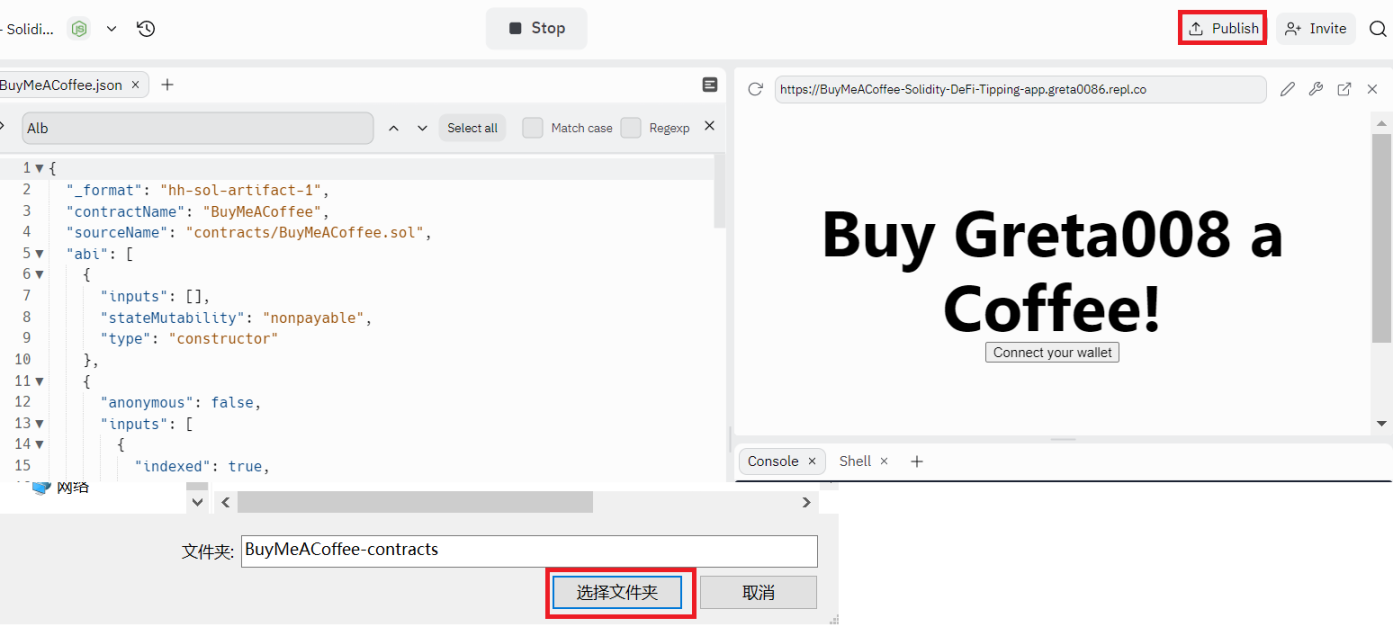
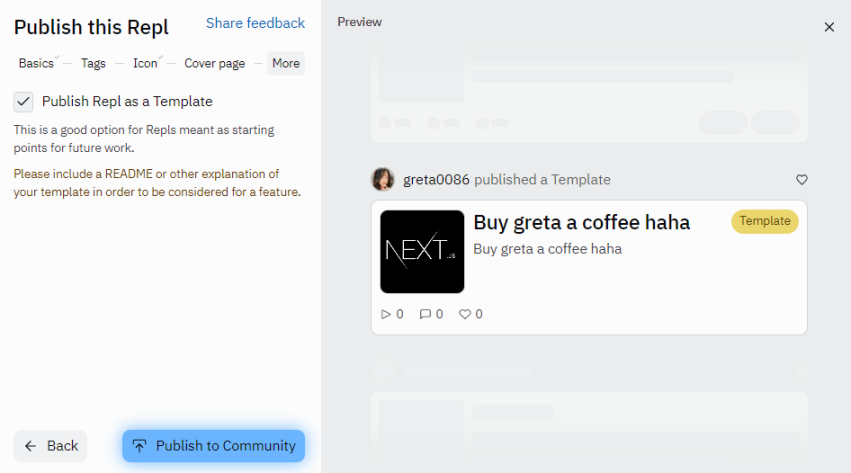
7.点击 publish。
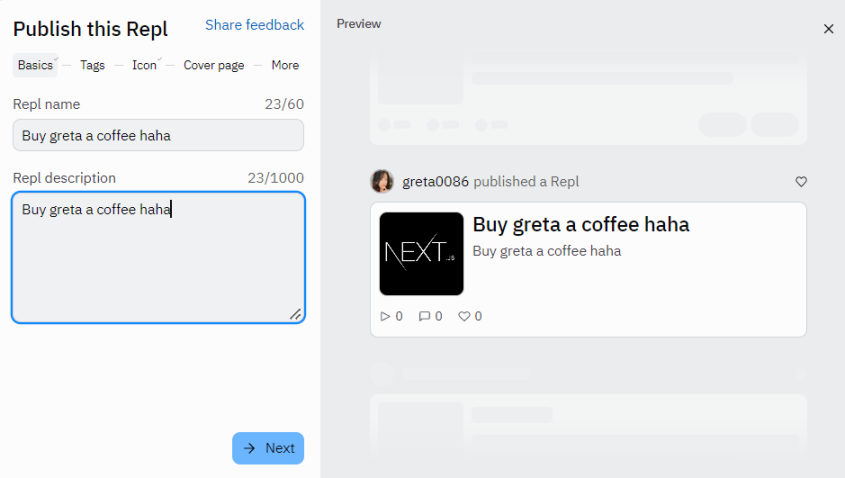
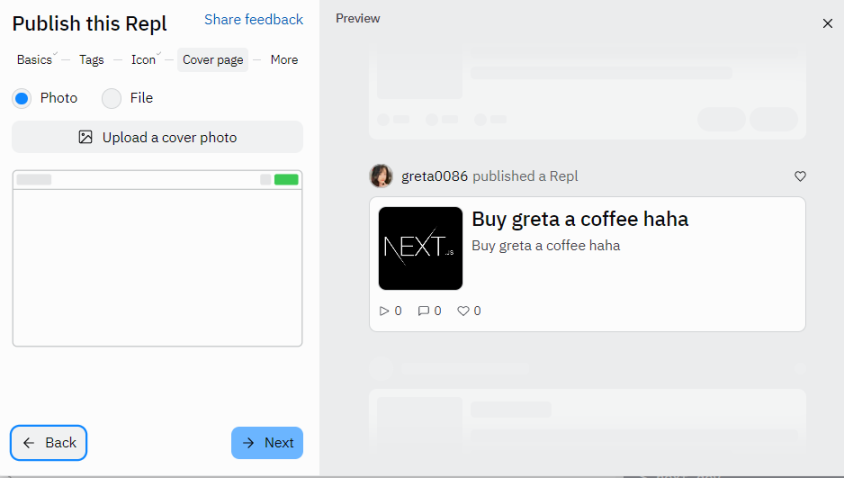
8.一直点下一步,最后 publish 即可。


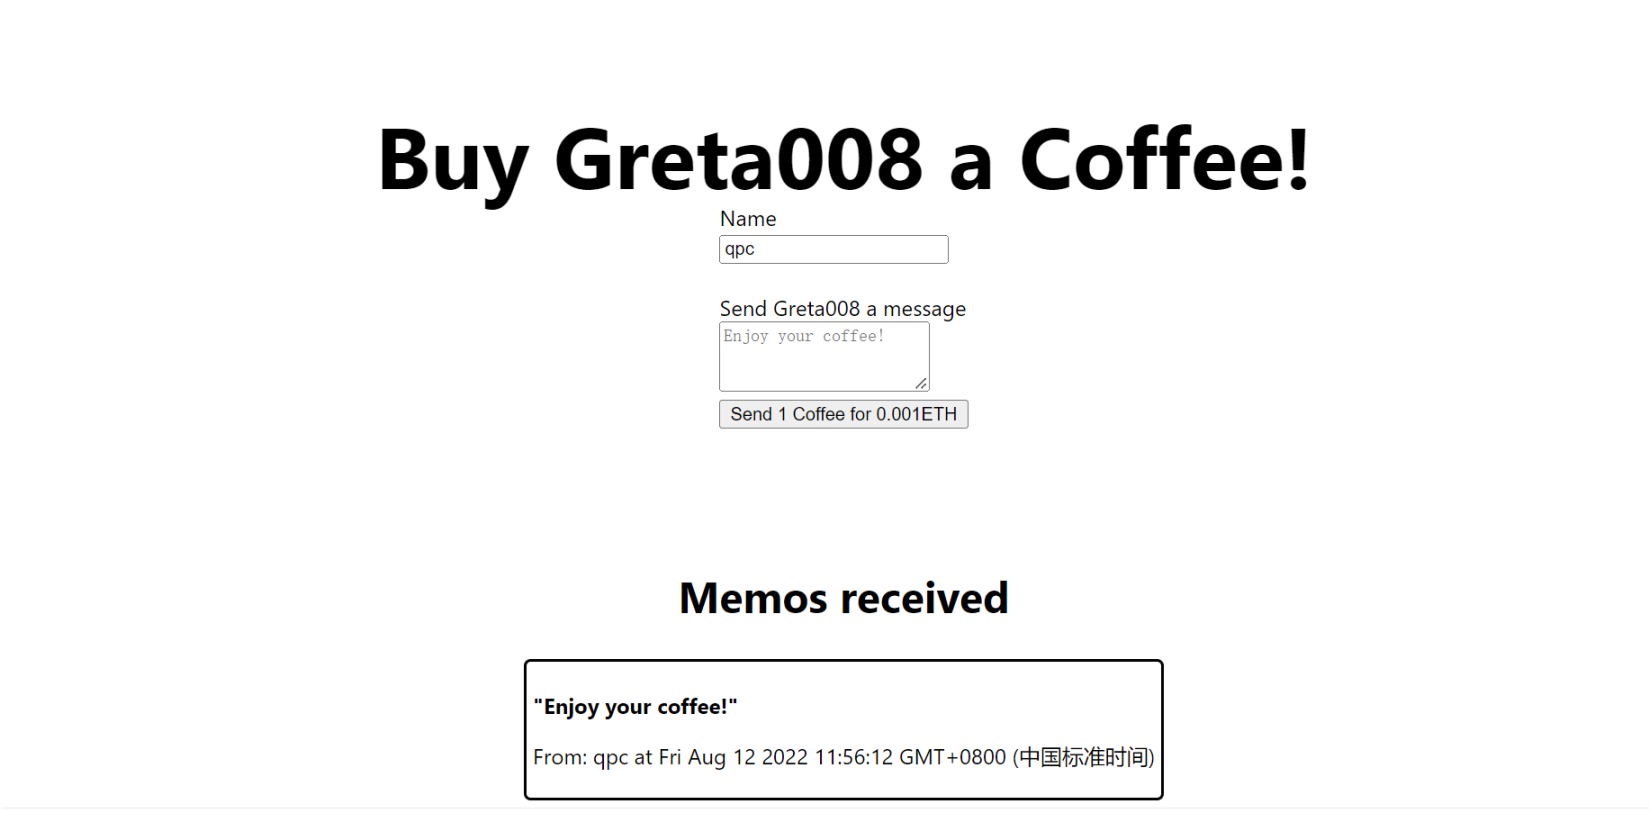
9.进入自己创建的网站试着几笔打赏就可以了。
step7 项目提交。
提交链接。
注意,最后一步提交内容为
step4 第 14 步的地址;
step6 第 8 步最后一张图的链接;
你自己的 replit 主页链接。
step8 领取 NFT。
领取链接。


【免责声明】市场有风险,投资需谨慎。本文不构成投资建议,用户应考虑本文中的任何意见、观点或结论是否符合其特定状况。据此投资,责任自负。